
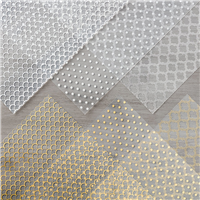
The other day I was playing around in my Stampin’ Studio and came across an unopened package of the Fabulous Foil Designer Acetate. I decided it was time to create something fun with this special “paper”. These are 12″ x12″ Acetate sheets (like our Window Sheets) only these have stunning designs printed on them. There are 3 different designs and you get 2 of each sheet. Another great thing about these sheets is that they’re reversible! That’s right, they’re Silver on one side and gold on the other, so it really allows for a lot of versatility. I decided to go silver for the first card.
Today’s Color Palette

Let’s Take a Closer Look

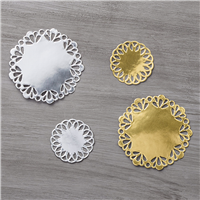
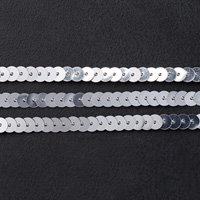
Sticking with a sliver theme, I used the sentiment from Here’s to Cheers stamp set and did some heat embossing. I then layered it onto one of the large silver Metallic Foil Doilies. Isn’t that fun? I also added some Silver Sequin Trim for a bit more sparkle and shine. Check out the Gold version too!

And look… I decided I wanted to try it with Copper, so I stamped a Gold Doily with the VersaMark Pad and sprinkled Copper Embossing Powder over the doily, then heat set it with the Heat Tool. How cool is that to have a copper doily too! Makes you want to order up a bunch of those Metallic Foil Doilies doesn’t it?

Stampin’ Studio Tips
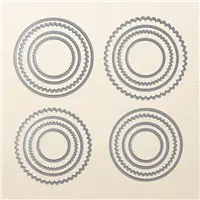
- Measurements: Smoky Slate: 4-1/4″ x 9-3/4″ score at 5-1/2″. Whisper White: 4″ x 5-1/4″ and 4″ x 4″ and 2-1/2″ x 2-1/2″ for circle die cut. ⦁ Fabulous Foil Designer Acetate : 4″ x 4″. 5/8″ Organza Ribbon: 5-1/2″. Silver Sequin Trim: 5-1/2″
- Tips: Roll up a Mini Glue Dot and put on each corner of the Fabulous Foil. Designer Acetate sheet (hiding it under the printed design). Attach the acetate to the 4″ x 4″ Whisper White cardstock.Wrap the Organza Ribbon around the center of the front acetate & white cardstock layer and secure to the back side with mini glue dots. ⦁ Wrap the Sequin Trim over the Organza Ribbon and secure to the back side with mini glue dots. ⦁ Attach this layered piece to the front panel of the card. ⦁ Attach the 5-1/4″ x 4″ piece of Whisper White cardstock to the inside of the card. ⦁ Rub the Embossing Buddy over the 2-1/2″ x 2-1/2″ piece of Whisper White cardstock to remove the static from the paper. ⦁ Stamp the image in VersaMark ink. ⦁ Sprinkle Silver Stampin’ Emboss Powder over the stamped image. ⦁ Pour off excess powder and heat emboss with the Heat Tool. ⦁ Once the embossed image has cooled, cut the image out using the Layering Circles Framelits (use the 5th from the larges framelit) ⦁ Attach the embossed image to the large Silver Doily with Snail Adhesive. ⦁ Attach Stampin’ Dimensionals to the back of the doily and attach to the front panel of the card so that it hangs over the panel edge being careful to not attach it to the inside panel of the card.










Stunning! Every last one of them!
Thank you Vicky, I love the look of the metallics.