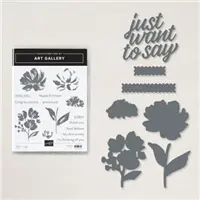
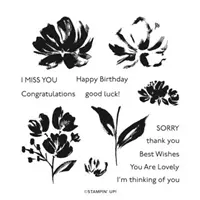
Oh my gosh, can I just say how much fun I’ve been having with the Fine Art Floral Suite!? I’ve created a set of 5 cards using the different images in the Art Gallery stamp set and coordinating Floral Gallery Dies as well as the Fine Art Designer Series Paper and more. I will be showcasing these cards over the next week or so. Be prepared to fall in love with this suite!

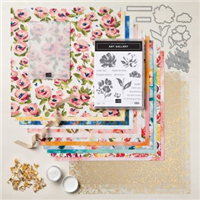
Look at everything in the Fine Art Suite. Each item can be purchased individually or you can get the whole collection.

Measurements:
- Blushing Bride: 8-1/2” x 5-1/2” score at 4-1/4
- Shimmery White: 4” x 5-1/4” and 3-1/4” x 3-1/4” and 3” x ¾”
- Poppy Parade: 4” x 1”
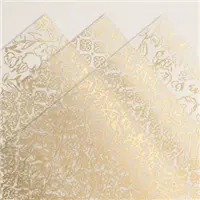
- Golden Garden Designer Specialty Acetate: 4” x 1”
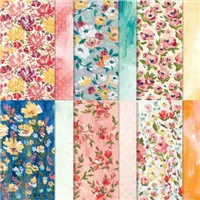
- Fine Art Floral Designer Series Paper: 2” x 4”
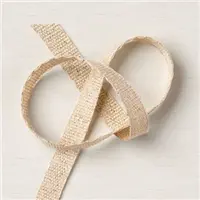
- Fine Art 3/8” Ribbon: 5”
Instructions:
- Fold card base in half on score line and attach large Shimmery White layer to front of card with Stampin’ Seal.
- Use Banner Triple Punch on one end of the Fine Art Floral Designer Series Paper and attach to card front as shown.
- Attach Poppy Parade piece to card front over the banner.
- Use Mini Glue Dots to attach the Golden Garden Designer Specialty Acetate to the Poppy Parade piece. Position the glue dots so they will be covered up with the stamped image.
- Use Mini Glue Dots to attach the Fine Art Ribbon to the card front as shown.
- Use Poppy Parade Ink and the more filled in flower petal image, stamping off once then stamping on the square Shimmer White cardstock. Next stamp the less filled in flower petal image with Poppy Parade ink directly on top of the first stamped image (without stamping off).
- Use Mossy Meadow ink to stamp the stem under the flower, then cut this image out using the largest circle in the Layering Circles Dies and attach to card with Stampin’ Dimensionals.
- Stamp the “Happy Birthday” sentiment in Poppy Parade on the remaining piece of Shimmer White and die cut it out with the larger scalloped piece from the Floral Gallery Dies and attach this to card as shown with Stampin’ Dimensionals.
Supplies used on this card can be ordered below by clicking on the photos


 Place an order of $30 or more using my current host Code and you’ll receive 4 card project tutorials that you will not see featured on my blog.
CURRENT HOST CODE: Use this host code to place your online order. If your order is over $150 DO NOT use the code – you’ll get your own Stampin’ Rewards from Stampin’ Up! and you’ll still get the project tutorials from me. Just copy/paste this code: MCH6RT2K when placing your order.
FOLLOW ME….
Facebook: https://www.facebook.com/tinasstampinstudio/
Pinterest: https://www.pinterest.com/tinarappe/stampin-studio-creations/
Sign up for my Newsletter: https://stampinstudio.com/subscribe