Quite Curvy Variety Bundle is available now!

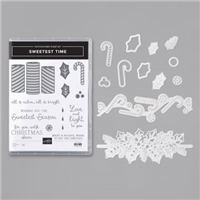
I am excited to announce a brand new set of products….The Quite Curvy Variety Bundle is available now!  That’s right, two new stamp sets, dies, and designer series paper.  I created this adorable Christmas card using the Curvy Christmas stamp set and the coordinating Curvy Dies.

Stampin' Up! Quite Curvy Variety Bundle, Quite Curvy Bundle, Quite Curvy stamp set, Curvy Dies, Curvy Christmas stamp set, Stampin' Studio

Measurements:

  • Misty Moonlight: 5-1/2” x 8-1/2” scored at 4-1/4 for card base and 2-1/2” x 3-3/4” for top curvy piece
  • Seaside Spray: 5-1/4” x 4”
  • Whisper White: 5” x 3-3/4” and ¾” x 2-3/4” for banner
  • Feels Like Frost Specialty Designer Series Paper: 2-1/2” x 3-3/4”
  • Seaside Spray Metallic Ribbon: 8”

 Instructions:

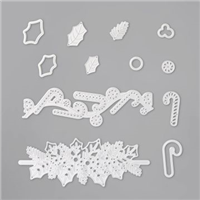
  • Use Curvy Dies and Stampin’ Cut & Emboss Machine to die cut the “dotted curvy” edge on the Misty Moonlight cardstock and the Feels Like Frost Specialty Designer Series Paper as shown, then attach these two pieces to large Whisper White piece.
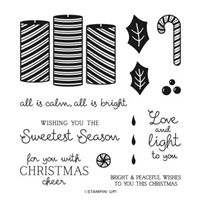
  • Stamp the “curvy stars” on the Whisper White between the two curvy pieces with Misty Moonlight ink.
  • Tie a bow in the Seaside Spray Metallic Ribbon and secure the ends to the backside of the Whisper White layer.
  • Attach the Whisper White layer to the Seaside Spray piece and attach to the card front.
  • Stamp Merry Christmas on the small Whisper White piece with Misty Moonlight ink.
  • Cut a notch from the left side of the sentiment piece to make a banner.
  • Attach banner to cad front with Stampin’ Dimensionals.
  • Attach 3 of the Blue Adhesive-Backed Gems to the banner as shown.

Stampin' Up! Quite Curvy Variety Bundle, Quite Curvy Bundle, Quite Curvy stamp set, Curvy Dies, Curvy Christmas stamp set, Stampin' Studio

Celebrate with curvy stamps, dies, and more! Designed for a variety of special occasions, the Quite Curvy Variety Bundle includes everything you need to create one-of-a-kind crafts. Don’t let stress steal your spirit—get ahead and order this exclusive bundle for a festive and frenzy-free season!

If you are unable to view the video, please click HERE

I will be offering a class featuring the Curvy Christmas stamp set so be on the look out for that in the next few days.

Thank you for taking time to visit my blog, for shopping with me and for your loyalty to Stampin’ Studio!  I know there are a lot of demonstrators out there to choose from… THANK YOU for choosing me!  To show my appreciation, I have something special for you!  When you use the Host Code on your order, you earn rewards from me! 

Place an order of $30 or more using my current host Code and you’ll receive 4 card project tutorials that you will not see featured on my blog. 

CURRENT HOST CODE: Use this host code to place your online order.  If your order is over $150 DO NOT use the code – you’ll get your own Stampin’ Rewards from Stampin’ Up! and you’ll still get the project tutorials from me.

Just copy/paste this code: MQKUJPGS when placing your order.

FOLLOW ME….

Facebook: https://www.facebook.com/tinasstampinstudio/ 

Pinterest: https://www.pinterest.com/tinarappe/stampin-studio-creations/

Sign up for my Newsletter: https://stampinstudio.com/subscribe


Sweetest Time Bundle

I’ve got another fun card I created with the Sweetest Time Bundle, which includes the Sweetest Borders Dies and the Sweetest Time stamp set.  If you missed my post last week, that features the same bundle you can view that HERE.

Sweetest Time stamp set, Sweetest Border Dies, Sweetest Time Bundle, Stampin' Studio

I used the Heart Warming Hugs Designer Series Paper for the background, then I used the Sweetest Borders Die with Old Olive cardstock for the stunning “positive & negative” die cut.  I love how you can see the polka-dot print through the die cut image.  

Sweetest Time stamp set, Sweetest Border Dies, Sweetest Time Bundle, Stampin' Studio

For the berries in the “positive & negative” die cut, I used the same die with real Red cardstock and only used the berry pieces, which I attached with a bit of the Multi-Purpose Glue for a stunning effect.

You can order the supplies used on today’s card by clicking on the photos below:

Supply List

Thank you for taking time to visit my blog, for shopping with me and for your loyalty to Stampin’ Studio!  I know there are a lot of demonstrators out there to choose from… THANK YOU for choosing me!  To show my appreciation, I have something special for you!  When you use the Host Code on your order, you earn rewards from me! 

Place an order of $30 or more using my current host Code and you’ll receive 4 card project tutorials that you will not see featured on my blog. 

CURRENT HOST CODE: Use this host code to place your online order.  If your order is over $150 DO NOT use the code – you’ll get your own Stampin’ Rewards from Stampin’ Up! and you’ll still get the project tutorials from me.

Just copy/paste this code: MQKUJPGS when placing your order.

FOLLOW ME….

Facebook: https://www.facebook.com/tinasstampinstudio/ 

Pinterest: https://www.pinterest.com/tinarappe/stampin-studio-creations/

Sign up for my Newsletter: https://stampinstudio.com/subscribe


Sweetest Time stamp set

The Sweetest Time stamp set is one of those that caught my attention the very first time I flipped through the Holiday Mini Catalog.  I LOVE the sentiments and fonts used and the holly berries and leaves and the candy cane and the peppermint candies and the candles.  Needless to say I love it all!  

Stampin' Up! Sweetest Time Stamp set, Sweetest Borders Dies, Stampin' Studio

To top off the Sweetest Time stamp set, did you realize the Sweetest Borders Dies coordinate with it and make for some stunning projects when paired together.  BONUS….the Sweetest Time stamp set and the Sweetest Borders Dies can be purchased together at the bundle price for a 10% savings!

Stampin' Up! Sweetest Time Stamp set, Sweetest Borders Dies, Stampin' Studio

The pretty plaid print is from the Heart Warming Hugs Designer Series Paper which is on sale at 15% off through October 31st only.  Did you notice the delicate embossing on the Real Red cardstock?  That was done with the Wrapped in Texture Embossing Folder. Stampin' Up! Sweetest Time Stamp set, Sweetest Borders Dies, Stampin' StudioThe sentiment was stamped on a label I cut out with the Stitched So Sweetly Dies.  Then I stamped the candy cane and the berries in Real Red ink and the holly leaves in Mossy Meadow ink on Whisper White cardstock, then cut them out with the coordinating dies and popped them up on the card with Stampin’ Dimensionals.  

You can order the supplies used on today’s card by clicking on the photos below:

Supply List

Thank you for taking time to visit my blog, for shopping with me and for your loyalty to Stampin’ Studio!  I know there are a lot of demonstrators out there to choose from… THANK YOU for choosing me!  To show my appreciation, I have something special for you!  When you use the Host Code on your order, you earn rewards from me! 

Place an order of $30 or more using my current host Code and you’ll receive 4 card project tutorials that you will not see featured on my blog. 

CURRENT HOST CODE: Use this host code to place your online order.  If your order is over $150 DO NOT use the code – you’ll get your own Stampin’ Rewards from Stampin’ Up! and you’ll still get the project tutorials from me.

Just copy/paste this code: PPDBEVYV when placing your order.

FOLLOW ME….

Facebook: https://www.facebook.com/tinasstampinstudio/ 

Pinterest: https://www.pinterest.com/tinarappe/stampin-studio-creations/

Sign up for my Newsletter: https://stampinstudio.com/subscribe