How to attach stickers to Red Rubber Cling Stamps

I often get asked how to….., so I thought I’d start sharing videos on how I do some of the things you’ve been wondering about.  One common thing I get asked is , “What’s the easiest way to attach the little stickers to the Red Rubber Cling stamps?”  There are a few ways to do it, but I’ve created a video to share the easiest way for me to do it.

If you’re unable to view the video, please click HERE

If you found this video helpful, you may also enjoy these videos.

If you’re unable to view the “How to fix a Broken Punch” video,

please click HERE

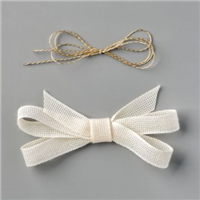
If you’re unable to view the “How to Tie a Bow with the Bow Maker” video, please click HERE

If you’re unable to view the “4 ways to use your Stamparatus” video,

please click HERE

If there are other things you’d like to know how to do, please leave a comment or pop me an email and you just might find your suggestion being featured in an upcoming video.

Need some supplies?  Oh, how I would appreciate your business!  I am so happy to help you with your creative juices–and when you support my online store it brings more amazing videos to you!

Thank you so much for taking time to visit my blog.  I truly appreciate you.  Your comments and orders are always appreciated!

CURRENT HOST CODE

Use this host code to place your online order.  If your order is over $150 DO NOT use the code – you’ll get your own Stampin’ Rewards from Stampin’ Up!

Just copy/paste this code: ZASA6N3Z when placing your order.

Forever Fern Stampin’ at Home Class

Happy Monday everyone! I hope you had a great weekend.  We sure did; we went sailing, had dinner on the deck with friends and I was busy creating in my Stampin’ Studio.  I am so thrilled that so many of you LOVED my Tasteful Touches Stampin’ at Home class and registered for it.  Sadly, yesterday was the deadline for that class.  

Not to worry, though because I have another gorgeous Stampin’ at Home class to offer.  My newest class is Forever Fern Stampin’ at Home Class. but first, I want to share with you this fun card which also features the Forever Fern stamp set.

Stampin' Up! Forever Fern stamp set, Stampin' Studio

Color Combo

I’ve used the Forever Greenery Embossing Folder to add the stunning texture on the background.  Note the soft colored background of the square layered piece.  My video offers step by step details on how to achieve these results.  The Gold Foil element adds a touch of sophistication to this card.  Be sure to check out the videos for all of the details.

Stampin' Up! Forever Fern stamp set, Stampin' Studio

Measurements:
  • Pretty Peacock: 8-1/2″ x 5-1/2″ and 2-1/2″ x 2-1/2″ and scrap for circle
  • Whisper White: 5-1/4″ x 4″ for background, 2-1/4″ x 2-1/4″ and scrap for circle 
  • Forever Gold Laser-Cut Specialty Paper 5-1/4″ strip from frame & round leaf die cut

If you’re unable to view video, please click HERE

Stampin' Up! Forever Fern stamp set, Stampin' Studio

Now offering my new Forever Fern Stampin’ at Home Class.  Registration Deadline is June 21st.  Email or leave a comment if you’d like to register and I’ll send you a PayPal Invoice.  Full details of the class are at the end of today’s video.

Stampin' Up! Forever Fern stamp set, Forever Flourishing Dies, Forever Greenery Suite, Stampin' at Home Class,Stampin' Studio

Need some supplies?  Oh, how I would appreciate your business!  I am so happy to help you with your creative juices–and when you support my online store it brings more amazing videos to you!

Supplies used on today’s card

Thank you so much for taking time to visit my blog.  I truly appreciate you.  Your comments and orders are always appreciated!

CURRENT HOST CODE

Use this host code to place your online order.  If your order is over $150 DO NOT use the code – you’ll get your own Stampin’ Rewards from Stampin’ Up!

Just copy/paste this code: ZASA6N3Z when placing your order.

Forever Fern Bundle

When I first flipped through the pages of the new Annual Catalog, the Forever Greenery Designer Series Paper caught my attention immediately.  From there, my eyes noticed the stunning Forever Fern stamp set and the Coordinating Forever Flourishing Dies.  After playing around with these products, I can easily say this bundle is a must have!

Stampin' Up! Forever Fern stamp set, Forever Flourishing Dies, Forever Greenery DSP, Stampin' Studio

I kept the color pallet very simple, just Pretty peacock and Whisper White.  The Forever fern stamp set is a “DistINKtive” set in that the images have great depth and shading to them; kind of like a photograph.  Isn’t it stunning?

Stampin' Up! Forever Fern stamp set, Forever Flourishing Dies, Forever Greenery DSP, Stampin' Studio

Measurements

  • Pretty Peacock: 5-1/2” x 8-1/2”
    • 2-3/4” x 2-3/4”
    • 3” x 4”
  • Whisper White: 4″ x 5-1/4″
    • 2 pieces 2-1/2” x 2-1/2”
  • Forever Greenery Designer Series Paper: 4” x 2-1/2”
  • Old Olive/Pretty Peacock Reversible Ribbon: 5-1/2″
  • Gold Thread from Forever Greenery Trim Combo Pack: 8”

 Instructions:

  • Stamp sentiment in Pretty Peacock in along top edge of large Whisper White piece.
  • Attach Forever Greenery Designer Series Paper to lower edge of large Whisper White piece.
  • Wrap Old Olive/Pretty Peacock reversible Ribbon around large Whisper White piece wat the top edge of the Forever Greenery DSP and secure to the back with Stampin’ Seal, then attach the large Whisper White piece to front of card base.
  • Cut large leaf from Pretty Peacock cardstock using the Forever Flourishing Dies.
  • Cut the leaves into two pieces and attach to the card front with Mini Glue Dots positioning as shown.
  • Stamp the leaf image in Pretty Peacock Ink by stamping off once per image on the medium size Whisper White piece and attach to the smallest Pretty Peacock piece.
  • Attach this piece to the card front as shown using Stampin’ Dimensionals.
  • Stamp the leaf image in Pretty Peacock Ink on the small Whisper White piece and cut it out using the coordinating die from Forever Flourishing Dies.
  • Center the die-cut leaf over the other leaf images and attach with Stampin’ Dimensionals.
  • Tie a bow with the Gold Thread from the Forever Greenery Trim Combo Pack and attach to the stem of the die-cut leaf with a Mini Glue Dot.


Need some supplies?  Oh, how I would appreciate your business!  I am so happy to help you with your creative juices–and when you support my online store it brings more amazing videos to you!

Supplies used on today’s card

Supply List

Thank you so much for taking time to visit my blog.  I truly appreciate you.  Your comments and orders are always appreciated!

CURRENT HOST CODE

Use this host code to place your online order.  If your order is over $150 DO NOT use the code – you’ll get your own Stampin’ Rewards from Stampin’ Up!

Just copy/paste this code: ZASA6N3Z when placing your order.