Floating Element on Window Sheets

I’ve got a fun new technique I was inspired to try.  This uses our Window Sheets (acetate) for a floating element.  Its a bit hard to see in the photo, but if you look close you can see a little light reflection on the Window Sheet that is die-cut and has the strips of paper attached.  Let me explain how to do it.

Stampin' Up! Palms Dies, Beautiful Shapes Dies, Stampin' Studio

Color Combo

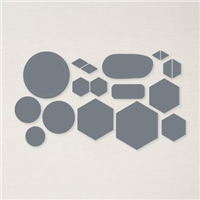
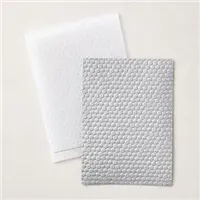
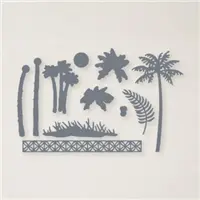
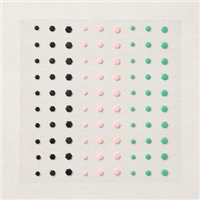
I cut a piece of Window Sheet that measured 2-1/2″ x 4-3/4″and laid it vertically on my work space.   Next I attached   1/2″ strips of Coastal Cabana, Mango Melody and Bermuda Bay cardstock to the window sheet with Seal Adhesive leaving a small space between each strip.  Once I had the Window Sheet covered with strips of card stock, I die-cut the Window Sheet using the Beautiful Shapes Dies ( the 2 largest Hexagon shapes).  I stamped the sentiment in Memento ink on one of the strips, then attached the two hexagons together with Seal, over lapping them a bit.  I ran a piece of Basic White cardstock through the Hive Embossing Folder and attached it to the Bermuda Bay card front. Stampin’ Dimensionals were attached to the back of the hexagon shapes making sure they didn’t show through on the front, then attached this Floating Element to the front of the card.  I used Basic Black cardstock to die cut the Palm Tree silhouette using the Palms Dies, and attached this to the Floating Elements.  The finishing touch was the addition of the Adhesive-Backed Hexagons.  Don’t you just love the Hexagon shapes in the dies, the Hive Embossing Folder and the Adhesive Backed Hexagons?

Stampin' Up! Awesome Otters stamp set, Sale-a-bration 2022, Stampin' Studio

Join me this Wednesday, January 12th and every Wednesday evening at 7:00PM CT on my Facebook Page for a Live stamping session with me.  This week I’ll be showing you how to make this adorable card featuring a FREE Sale-a-bration product called Awesome Otters.  You’ll find me Facebook: https://www.facebook.com/tinasstampinstudio/

Supply List to Make Today’s Card

Supply List

Thank you for taking time to visit my blog, for shopping with me and for your loyalty to Stampin’ Studio! I know there are a lot of demonstrators out there to choose from… THANK YOU for choosing me! To show my appreciation, I have something special for you! When you use the Host Code on your order, you earn rewards from me! Place an order of $30 or more using my current host Code and you’ll receive 3 card project tutorials that you will not see featured on my blog.

CURRENT HOST CODE: Use this host code to place your online order. If your order is over $150 DO NOT use the code – you’ll get your own Stampin’ Rewards from Stampin’ Up! and you’ll still get the project tutorials from me. Just copy/paste this code: MEJQMBY4  when placing your order.

FOLLOW ME….

Facebook: https://www.facebook.com/tinasstampinstudio/

Pinterest: https://www.pinterest.com/tinarappe/stampin-studio-creations/

Sign up for my Newsletter: https://stampinstudio.com/subscribe

Flowering Tulips

I know we just turned the page on the calendar and we’ve got a long winter ahead of us, but I love the Flowering Tulips stamp set and the Flowering Fields Designer Series Paper so much, I just couldn’t wait to share this with you.

Stampin' UP! Flowering Tulips stamp set, Stampin' Studio

Color Combo

I did not use all of these colors on my card but the colors are found in the Designer Paper.

Measurements

  • Thick Basic White: 4-1/4” x 11” score at 5-1/2” for card base
  • Flowering Fields Designer Series Paper Basic White: 4” x 5-1/4”
  • Poppy Parade: 3-1/8” x 4-1/4”
  • Basic White:3” x 4-1/4”

Instructions:

  • Fold Thick Basic cardstock at score line for card base.
  • Attach Flowering Fields Designer Series Paper and Poppy Parade cardstock to card front with Stampin’ Seal
  • Use the largest of the dies from the Stitched So Sweetly Dies to die-cut the shape from the Basic White piece
  • Stamp sentiment in Memento ink as shown
  • Stamp stem and leaves in Mossy Meadow ink, then use the Blender Pen to fill in the leaves so there is no white showing
  • Stamp large tulip on stem with Poppy Parade ink, the repeatedly stamp all of the smaller tulip shapes over the top by stamping off once prior to stamping. This gives a variegated look to the flower.
  • Attach The stamped image to the card front with Stampin’ Dimensionals
  • Attach 3 of the Classic Matted Dots to the card front

Supply List to Make Today’s Card

Supply List

Thank you for taking time to visit my blog, for shopping with me and for your loyalty to Stampin’ Studio! I know there are a lot of demonstrators out there to choose from… THANK YOU for choosing me! To show my appreciation, I have something special for you! When you use the Host Code on your order, you earn rewards from me! Place an order of $30 or more using my current host Code and you’ll receive 3 card project tutorials that you will not see featured on my blog.

CURRENT HOST CODE: Use this host code to place your online order. If your order is over $150 DO NOT use the code – you’ll get your own Stampin’ Rewards from Stampin’ Up! and you’ll still get the project tutorials from me. Just copy/paste this code: MEJQMBY4  when placing your order.

FOLLOW ME….

Facebook: https://www.facebook.com/tinasstampinstudio/

Pinterest: https://www.pinterest.com/tinarappe/stampin-studio-creations/

Sign up for my Newsletter: https://stampinstudio.com/subscribe

Order & Earn New Products Now!

The Stampin’ Up! Spring Mini Catalog (also known as the January – June Mini Catalog) product release and Sale-A-Bration promotion Start NOW! There are many new products available for purchase AND to earn FREE during Sale-A-Bration.    

Stampin' Up! Spring Mini Catalog & Sale-a-bration Catalog, Stampin' Studio

Stampin’ Up!’s Spring Mini Catalog

It’s here! It’s here! Stampin’ Up!’s Spring Mini Catalog is up-and-running (and ready for your orders). Woo hoo!  You can click on the picture below to download your very own copy:

 Sale-A-Bration runs from January 4 – February 28! 

 Click on the image below to download a copy of this brochure for yourself:


Let me walk you through the three ways you can get the most of out this year’s Sale-a-Bration event.

1. SHOP DURING SALE-A-BRATION

Earn FREE Sale-A-Bration gifts at the $50 and $100 levels (total before shipping and tax).  No limit to how many gifts you can earn based on increments of $50 or $100.

2. HOST DURING SALE-A-BRATION

You can Host a party by either collecting orders from friends & family or order it all yourself.  During Sal-A-Bration, when you place an order for more than $300 you will automatically receive the gorgeous Calming Camellia Cling Stamp Set. Here’s the set:

Calming Camellia Host Set, Stampin Up! 158117

3. JOIN DURING SALE-A-BRATION

           This is my FAVORITE way for you to save during Sale-a-Bration, and it’s perfect for you!               Purchase the $99 Starter Kit and get:

  • Your choice of $125 in product for $99 from Annual Catalog, Spring Mini Catalog, Clearance Rack, Prepaid Paper Pumpkins and Online Kits
  • Free Shipping on the starter kit (that’s a 10% savings right there)
  • TWO FREE stamp sets of your choice (from the Annual Catalog or current Mini Catalog)
  • You will earn a 20% discount on all purchases immediately after joining (and for as long as you are an active demonstrator). Don’t you LOVE saving money!?!
  • See and pre-order (with your discount) NEW PRODUCTS a month before they are available to customers.  Ordering before the customer launch means you get to play with new products first with less chance of a hot, new product running out! You’ll get first opportunity to order products
  • While Sale-a-Bration rewards don’t accrue to your Starter Kit, you will earn all the Sale-a-Bration rewards that customer earn after your starter kit with an opportunity to earn rewards available to demonstrators.
  • Our Stampin’ Sisters Family (that’s the name of our team) has our own Facebook Group  where you’ll receive lots of encouragement, creative inspiration and friendships.
  • Monthly Tutorials from our Team Leaders
  • Optional team events throughout the year
  • You have no obligation to ever sell or share with anyone and no obligation to buy another thing if you don’t want to.
  • I welcome Hobby Stampers that want to save a bunch of money as well as Business Builders that want to make money.  

If you have thought about joining and want to be a part of an amazing online community of stampers, please email me today. I’d love to answer your questions or set up a time to chat with you. If you are ready to join my incredible team, CLICK HERE.

It’s an exciting day! Don’t miss out on these amazing, new products. Place your order today and start earning these exciting Sale-a-Bration rewards.

Join me tonight and every Wednesday evening at 7:00PM CT on my Facebook Page for a Live stamping session with me.  You’ll find me HERE

Thank you for taking time to visit my blog, for shopping with me and for your loyalty to Stampin’ Studio! I know there are a lot of demonstrators out there to choose from… THANK YOU for choosing me! To show my appreciation, I have something special for you! When you use the Host Code on your order, you earn rewards from me! Place an order of $30 or more using my current host Code and you’ll receive 3 card project tutorials that you will not see featured on my blog.

CURRENT HOST CODE: Use this host code to place your online order. If your order is over $150 DO NOT use the code – you’ll get your own Stampin’ Rewards from Stampin’ Up! and you’ll still get the project tutorials from me. Just copy/paste this code: MEJQMBY4  when placing your order.

FOLLOW ME….

Facebook: https://www.facebook.com/tinasstampinstudio/

Pinterest: https://www.pinterest.com/tinarappe/stampin-studio-creations/

Sign up for my Newsletter: https://stampinstudio.com/subscribe