Night of Navy and Whisper White is such a classic color combination. When silver is added to the pair, you’ve now moved it up a notch to classy. I adore the simple elegance of this card which features the Winter Woods Bundle from the Holiday catalog.

I want to talk to you about a product from the Holiday catalog that is easy to over look, but will make a simple card look stunning and will save you time on your projects. What am I talking about? Check out page 11 of the Holiday Catalog and look close…we’ve got Foil-Edged Cards & Envelopes. These cards & envelopes come 20 to a package and are available in Gold or Silver. I used the Silver Foil-Edged Card for the base of this project, so my card base and what looks like a matted layer are already done for me. I just added the Night of Navy layer and I’m all set.
Supplies:
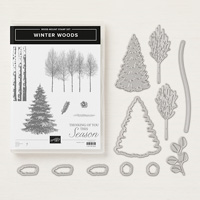
- Stamp Sets –Winter Woods- W(147658) C(147661)
- Card Stock –Night of Navy (100867); Sparkle Glimmer Paper (146957)
- Stamp Pads – VersaMark (102283)
- – Silver Foil-Edged Cards & Envelopes (147900); Big Shot (143263); In the Woods Framelits Dies (147919); Softly Falling Embossing Folder (139672); Silver Metallic-Edge Ribbon (144213); Embossing Buddy (103083); White Stampin’ Emboss Powder (109132); Heat Tool (129053); (103683); Snail Adhesive (104332); Mini Stampin’ Dimensionals ( 144108)
Measurements:
- Night of Navy cardstock: 4-3/4” x 3-1/2”
- Sparkle Glimmer Paper: 2-1/2” x 4″
- Silver Metallic-Edge Ribbon: 12”
Instructions:
- Rub Embossing Buddy over the Night of Navy cardstock to remove any static before stamping the sentiment in VersaMark ink
- Sprinkle White Stampin’ Emboss Powder over stamped image, tap off excess powder and heat emboss with the Heat Tool.
- Run stamped piece through the Big Shot with the Softly Falling Embossing Folder.
- Tie the Silver Metallic-Edge Ribbon in a bow and wrap ribbon around the Embossed cardstock securing on the back with Snail Adhesive.
- Attach the Night of Navy cardstock to the Silver Foil-Edged Card with Snail.
- Die-cut the tree from the Sparkle Glimmer Paper using the In the Woods Framelits Dies
- With your fingernail, pull up each of the “branches” from the tree to give it more dimension.
- Attach tree to the card front using Mini Stampin’ Dimensionals, making sure to not attach the “pulled up” branches.
My birthday was November 5th, so in celebration of it I have a special offer for you:

Every online order that is placed through my Online store from November 5th through November 11th will receive 9 Tutorials for 9 Christmas cards featuring product from the holiday catalog. The PDF tutorials will feature a photo of the card, supply list, measurements and full instructions.
Please use Hostess Code 393RTKXE
I will email your tutorials when I return from Orlando on the 11th. I’ll be at the Stampin’ Up! 30th year Anniversary Event called On Stage.
Supplies for today’s card