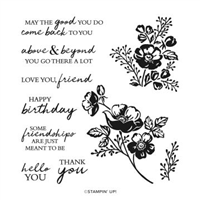
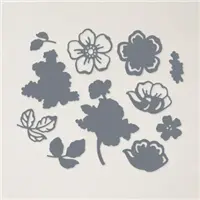
Oooooh, don’t you love Night of Navy paired with Basic White? It’s just so elegant and classic. My friend Susan Campfield created this card using the Shaded Summer stamp set and the Summer Shadow Dies.
 Not only is this a gorgeous card, but it’s also a Fun Fold called a Corner Tuck card. The front flap tucks into the triangle corner pocket. Isn’t that cleaver? I love that the Summer Shadow Dies (a free Sale-a-bration item with a $100 purchase) coordinates with the Shaded Summer stamp set found in the Annual Catalog.

Measurements:
- Night of Navy: 4 ¼” x 8” scored at 2 ½”; 3” x 3” cut diagonally
- Basic White: 3” x 3”; 2 ¾” x 2 ¾”; 3” x 4” (to stamp the flower on and die cut)
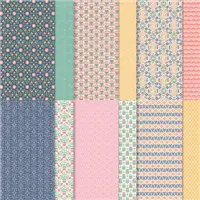
- DSP: 1” x 4”; 3” x 3” cut diagonally
Instructions:
- Stamp the flower in Night of Navy. Die cut the flower with the Shaded Summer dies.
- Stamp the greeting “hello you” in Night of Navy in the lower left corner of the 3″ x 3″ Basic White piece.
- Stamp a portion of the other flowering branch on the bottom right corner of the 2-3/4″ x 2-3/4″ Basic White piece.
- Adhere one of the triangular pieces of Designer Paper to one of the triangular pieces of Night of Navy. (Save the other triangle pieces for another card).
- On the back of this layered triangular piece, carefully place Dimensionals in each of the
three corners – place NO Dimensionals on the long, straight edge so that the corner of the front piece can tuck under. Adhere this in the upper right corner of the inside of the card. - Adhere the 1″ x 4″ piece of Designer Series Paper on the front of the card next to the folded edge.
- Place adhesive ONLY on the back left side of the “hello you” piece and adhere it to the card front. The upper right corner should tuck under the triangular Designer Paper piece.
- Place adhesive on the back of the 2-3/4″ x 2-3/4″ piece with the flowers in the bottom corner. Open the card and lightly tuck the upper right corner of this inside piece under the Triangular piece. Before completely adhering, close the card and make sure the inside piece won’t show when the card is closed. Press it in place.
- Place Dimensionals on the back of the die cut flower branch. Adhere it to the “hello you” piece on the front of the card, make sure the flower placement won’t interfere with the tucking of the upper right corner (placing the flower branch at an angel is best).
- Place three of the clear Elegant Faceted Gems (two large and one small) on the “hello you” piece on the card front.
- Wrap the ribbon around the left side of the front flap of the card, tie a knot.

Sale-a-bration is going strong – now through September 30th you can choose from a variety of products for FREE with a minimum $50 order.
You can order the supplies for today’s card by clicking the products below which will take you directly to my online store.
 CURRENT HOST CODE: Use this host code to place your online order. If your order is over $150 DO NOT use the code – you’ll get your own Stampin’ Rewards from Stampin’ Up! and you’ll still get the project tutorials from me. Just copy/paste this code: FGJ4UANN when placing your order.
FOLLOW ME….
Facebook: https://www.facebook.com/tinasstampinstudio/
Pinterest: https://www.pinterest.com/tinarappe/stampin-studio-creations/
Sign up for my Newsletter: https://stampinstudio.com/subscribe


