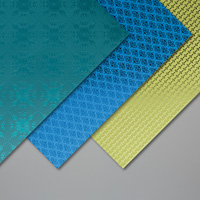
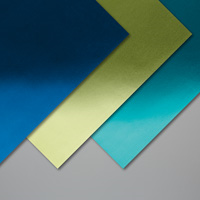
Today is the 4th and final day of my Noble Peacock Specialty Paper Series (see the other posts in the series HERE) and we’re featuring the stamp set called A Little Lace. This time I sued the Pretty Peacock print found in the Noble Peacock Designer Series Specialty Paper Package as well as a bit of the Nobel Peacock Foil Sheets. Like I said previously, you’ve really got to see this paper in person to truly appreciate how gorgeous it is, the photos just don’t do it justice.

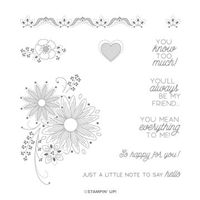
This is another Fun Fold card, so let me walk you through how to make it. I started with a card base of Shimmery White cardstock that measure 4-1/4″ x 8-1/2″ scored at 5-1/2″. I attached a 4″ x 2-3/4″ piece of the Pretty Peacock Specialty Designer Series Paper to the front flap, then inserted the Classic Label Punch as far into the flap as possible for the slit opening. Because the length of the slit is not long enough for the flap to go into it, I slid the punch down the card front a bit and punched again. This produces a class Label punch slit that is longer than normal. Next I cut a 2-3/4″ x 8-1/2 piece of Pretty Peacock cardstock and scored it at 4-1/4 to make a small card that opens to the right. Attach the small card to the inside of the card. The front of the small card gets tucked into the slit made with the Classic Label Punch. Cut two piece of Shimmery White cardstock 2-1/2″ x 4″. One piece is for the outside of the small card and the other is for the inside. For the stamping, I used the stamp set called A Little Lace and stamped the large image in Pretty Peacock ink on the outside flap, then used a Blender Pen and ink to add color to the image.

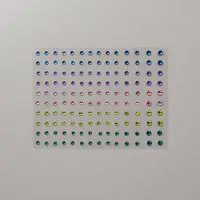
Use the border stamp and Pretty Peacock ink on the right hand edge of the card base inside and the small card inside, then use the Blender Pen and ink to add color to these images. Now you can close the left side flap of the card and insert the small card front through the Classic Label slit. Stamp the small floral image on a scrap piece of Shimmery White and color with the Blender Pen then punch out with the 1-3/8 Scallop Circle Punch and layer on a 1-1/2″ circle punched from the Pretty Peacock Foil Sheet. Strategically place a Stampin’ Dimensional behind the circle layers so that it doesn’t prevent the small card flap from sliding in and out of the slit. Finish off the card with the addition of some Pretty Peacock Rhinestones from the Nobel Peacock Rhinestones embellishments.
Order your Noble Peacock Papers and other supplies for this card by clicking on the photos below.