Tasteful Background Dies with A Wish for Everything

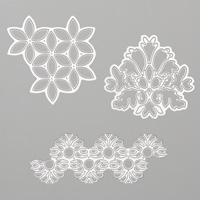
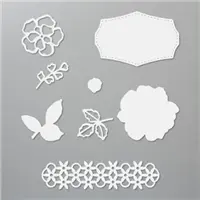
Hey you guys!!!!! If you haven’t paid attention to the Tasteful Background Dies in the Annual Catalog, you have got to take a closer look.  These dies are the bomb!  Not only do they make for some incredible backgrounds, check out how stunning it looks to use the die for the focal point on this card.

Stampin' Up! Tasteful Backgrounds Dies, A Wish For Everything stamp set, Stampin' Studio

With 3 lovely designs of  dies in the package, these dies will be a “go to” set for stunning embellishments and lovely background texture.

Tasteful Background Dies

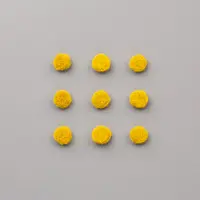
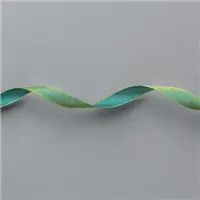
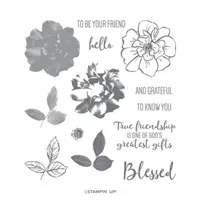
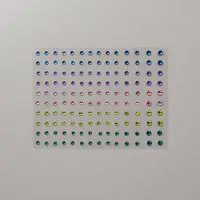
I started out with by die cutting a Stitched Shapes Circle , then die -cutting the ornate Tasteful Backgrounds die from it.  This was then layered on a scalloped circle of Smoky Slate cut from the Layering Circles Dies.  I attached a strip of Smoky Slate DSP on a 3-3-4″ x 5″ piece of Whisper White and wrapped a piece of Silver Metallic Edged Ribbon around the card and tied it in a knot, then stamped the sentiment from A Wish For Everything stamp set, before attaching it to the Smoky Slate card base.  The circle layers were attached to the card with Dimensionals and the card was finished off with the Metallic Pearls.

I’ll be sharing three more cards over the next three days that feature the tasteful background Dies, so be sure to come back.

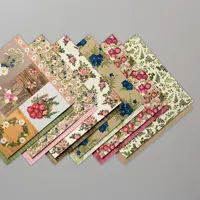
Supply list for this card.  Click photo to order online


Stamping on Designer Series Paper with the Daisy Lane stamp set

We all love stamping and we all love designer series paper.  So, why not combine them together and stamp on our fabulous designer series paper?  That’s what I’ve done on today’s card using the Daisy Lane Bundle and the Follow Your Art DSP.

.Stampin' Up! Daisy Lane Bundle, Daisy Lane stamp set, Medium Daisy Punch, Stampin' Studio

I used the images of the stems and leaves from the Daisy Lane stamp set and stamped them in Old Olive ink on the Follow Your Art Designer Series Paper.  This particular pint reminds me of clouds in the sky.  I stamped the small stem on a piece that measures 1″ x 5-1/4″ and the larger stem on a piece that measures 2-1/4″ x 5-1/4″.  The piece of Pretty Peacock cardstock between the pieces of DSP is embossed with the Eyelet Lace Embossing Folder.  I added a bow tied with the Reversible Old Olive/Pretty Peacock Ribbon before attaching it to the Thick Whisper White cardstock.  The daisies themselves are stamped in Pool Party ink on Whisper White and punched out with the Medium Daisy Punch.  For the large flower I punched two flowers and layered them on top of one another after curing some petals up and some down.  I then sponged the centers of the flowers with Crushed Curry Ink and attached a Perennial Essence Floral Center.  The small daisy was created by punching one daisy and cutting it in half before layering the pieces on top of one another.  So, what do you think of stamping on Designer Series Paper?  Have you given it a try?

Supplies used on today’s card


Where does your inspiration come from?

Where do you get your inspiration?  I get a lot of my inspiration from our fabulous Designer Series Papers, like the gorgeous Pressed Petals Specialty Designer Series Paper.  Not only did I get my color combination from this paper, but it instinctively drew me to the stamp set called To a Wild Rose.  The flowers in the paper closely resemble the image in the stamp set.

Stampin' Up! To a Wild Rose stamp set, Pressed Petals Specialty Designer Series paper, Stampin' Studio

Color Combo

This card was easy to make with just a strip of the Pressed Petals Specialty DSP on the lower edge of the whisper White background.  Next I added a piece of the Old Olive/Pretty Peacock Reversible Ribbon.  The rose outline was stamped in Merry Merlot while the flower itself was stamped in Rococo Rose.  The leaves were stamped in Mossy Meadow and both the flower and the leaves were cut out using the Wild Rose Dies, which can be purchased on their own or in a bundle with the stamp set for a 10% savings.  After adding the sentiment and a few of the Nobel Peacock rhinestones, I layered it on a piece of Merry Merlot before adding it to the Rococo Rose card base.
I want to remind you that Bonus Days are running out.  You only have 1 week left (July 31st is the last day) to earn you $5 coupon  for every $50 purchased.
Supplies used on today’s card