The Rule of Three!

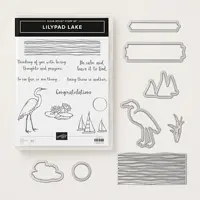
You know how sometimes you see a stamp set and it really doesn’t do anything for you?  Well, that’s how I felt about the Animal Outing stamp set I received at On Stage back in April.  All demonstrators were gifted this set, and I just kept thinking, “what am I going to do with this?”  Obviously there are cute images and it would be great to scrapbook pictures from a trip to the zoo, but beyond that and some cute baby cards, I had my doubts that I’d be using it much.  That is until I started playing with it!

Stampin' Up! Animal outing stamp set, Stampin' Studio

I use Lots of thank you cards on a regular basis, so I thought I’d start there.  I mean honestly, how can you NOT smile when you look at this adorable big rhino with the itty bitty bird…and did you see the from sitting on the branch smiling away?  I love to color with the Stampin’ Blends Markers, so it made adding color to the rhino a breeze.  The bird was colored in with Stampin’ Write Markers. 

I’ve mentioned many times over the years, that when I stamp I use my “Rule of Three”; that is layer, texture and embellish.  This card is a great example for this.  Obviously you can see that I love layers.  In this case I added some matting to the card base and the stamped image which helps to enhance the focal image.  Next, I added both visual and tactile texture to the card with the Basket Weave Embossing Folder.  And finally, I added and embellishment with the Lemon Lime Twist Ombre Ribbon.

I’d love to know if there’s a basic formula you use when you create.  I think it’s awesome to know how everyone’s creative juices get going.  Pop me an email or leave a comment. 

Lilypad Lake Bundle

When I saw the Lilypad Lake Bundle in the Annual Catalog, I knew I had to have it.  The stamp set has some pretty great sentiments as well as images of lily pads, water ripples, and a crane, but my favorite images are the sail boats.  Dave and I love to sail, so these images are right up my alley.  Things have been so crazy busy the past month or so, that we haven’t even been out sailing yet.  We had plans to go yesterday, but the wind was pretty much non existent, so I’ll have to look at this card and just imaging a great day of sailing on Lake Mendota in Madison.

Stampin' up! Lilypad Lake stamp set, Stampin' Studio

As is the case with so many of our stamp sets, there is a coordinating set of framelits to give you more creative options.  The Lakeside Framelits and the stamp set can be purchased separately or together in a bundle for a 10% savings.

Stampin' Up! Lilypad Lake Bundle, Stampin' Studio

Color Palette

Stampin' Studio Color Palette

Measurements:

Pacific Point:  5-1/2″ x 6-1/2″ scored at 4-1/4″

Whisper White: 5-1/4″ x 4″ and scrap for stamping boats and sun

Balmy Blue: 3-1/4″ x 3-1/4″

Poppy Parade: 3-1/2″ x 3-1/2″

Instructions:

Emboss the front flap of the card base with the Seaside Embossing Folder.

Attach Whisper White cardstock to the inside of the card.

Stamp the “water ripples” in Pacific Point in k on the Balmy Blue cardstock starting at the bottom edge, then once more above it without reinking the stamp.  This will give a lighter second image.

Make clouds using the cloud mask from the Pattern Party Decorative Masks.  Ink up a Sponge Dauber with Whisper White Ink and rub it through the mask onto the Balmy Blue cardstock.

Stamp boat images and sun in Stazon Ink on the scrap of Whisper White and cut out with the Lakeside Framelits.  Color in the boats and the sun with the Brights Stampin’ Write Markers.  Attach die cuts to the Balmy Blue piece with Stampin’ Dimensionals.

Make a “frame” by cutting a square out of the center of the Poppy Parade cardstock using the largest of the Layering Square Framelits.

Attach boating scene to the backside of the “frame” and attach this to the card front with Dimensionals being sure to only place dimensionals on the left side ot the “frame” so that you don’t secure the card closed.

Supplies

Price: $110.00

Graceful Glass Designer Vellum is Gorgeous!

Wow, wow, wow!  That’s what I think of the Graceful Glass Designer Vellum.  This 6″ x  6″ Paper Stack is part of the Graceful Glass Suite featured on pages 164 & 165 in the Annual Catalog and it is truly a MUST have product.  The paper stack has 24 sheets with 2 sheets each of 12 different designs.  The designs range from floral (as shown on today’s card) to geometric, to birds and whimsical, so there’s something for everyone and every occasion. 

Stampin' Up! Graceful Glass Designer Vellum, Painted Glass stamp set, Stampin' Studio

Color Pallet

Stampin' Studio Color Pallet

The design that I worked with here has 4 different flower panels on the sheet, so I just cut the paper into 4 panels so I had a lot of variety.  I colored on the back side of the vellum with Stampin’ Blends using the Light Calypso Coral and Light Old Olive.  By coloring on the back of the vellum the shades were much softer than the actual color itself, so I was able to use a couple of the new colors of cardstock.  I used Petal Pink and Soft Sea Foam.  Once I had the vellum colored, I attached it to a piece of Whisper White cardstock with Mini Glue Dots attached to the backside at the “pink squares ” so that the adhesive wouldn’t show through to the front.  The Whisper White strip was attached to the Petal Pink strip which was attached to the Whisper White card base that had been embossed with the Layered Leaf Embossing Folder.  The Soft Sea Foam banner was stamped with a sentiment from the Painted Glass stamp set, then attached to the card front.

Supplies