Using Sponge Daubers with the Petal Pair Embossing Folder

I had lots and lots of thank you cards to send out for orders placed in January, so I wanted a quick yet fun card to mass produce.  My inspiration came from a card my friend Patty Bennett made using the Petal Pair Embossing Folder.

Stampin' Up! Petal Pair Embossing Folder, Stampin' Studio

Color Palette

Stampin Studio Color Palette 2-6-18

I started out by running a 2″ x 5-1/2″ piece of Whisper White cardstock through the Big Shot with the Petal Pair Embossing Folder.  Next I tapped a Sponge Dauber in Peekaboo Peach ink and rubbed it in a circular motion on the two largest flowers.  I did the same thing with Crushed Curry and Flirty Flamingo on various other flowers followed by Pear Pizzazz for the leaves.  This was then layered on a 2-1/4″ x 51/2″ piece of Pear Pizzazz card stock then before I attached  it to the Thick Whisper White card base, I wrapped a piece of the Crushed Curry 3/8″ Mini Chevron Ribbon around these layers.  The Thank you sentiment was stamped in Pear Pizzazz ink and I finished the card off with three of the sequins from the Iridescent Sequin Assortment.

Stampin' Up! Petal Pair Embossing Folder, Stampin' Studio

Here is just the beginning of all the Thank you cards I sent out for January orders!  If you’d like to order any of the products I used to make these cards just click on the photos below and it will take you directly to my store.

Stunning Sympathy Cards made with the Sweet Soiree Embellishment Kit

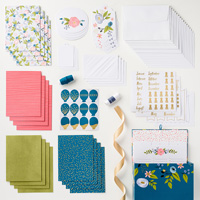
I was playing around with the Sweet Soiree Embellishment Kit the other day, and decided I wanted to come up with something unexpected from the kit.  The kit is shown on page 13 of the Occasions catalog, but it’s easy to miss with all that’s going on with that two page spread.  The Sweet Soiree Embellishment Kit has shiny accessories and embellishments in Old Olive, Flirty Flamingo, Daffodil Delight, Berry Burst and Marina Mist, there are tassels, washi tape, and mini clothes pins.  Not necessarily things you automatically use when designing sympathy cards.  But wait, there are also lovely vellum die cuts with silver foil floral designs.  That’s where it all began for me.

Stampin' Up! Sweet Soiree Embellishment Kit , Stampin' Studio

I used the exact same layout  for each of the four sympathy cards I made, I just changed up the Sweet Soiree Embellishment and the location of the sentiment.  Then I thought, why stop there?  Why not birthday cards using the kit?

Stampin' Up! Sweet Soiree Embellishment Kit , Stampin' Studio

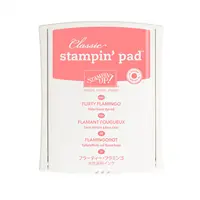
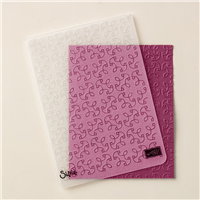
All that I did different here is instead of the Garden Trellis Embossing Folder, this time I used the Petal Pairs Embossing Folder for the background (running it through twice to cover the whole background).  I used Flirty Flamingo cardstock for the oval and Flirty Flamingo ink for the sentiment and “frame”.

Would you like to create some of these quick cards yourself?  Here’s a close up view of one of the cards as well as measurements and instructions below.

Stampin' Up! Sweet Soiree Embellishment Kit , Stampin' Studio

Supplies:
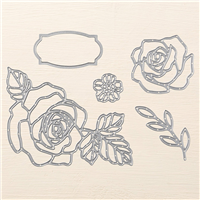
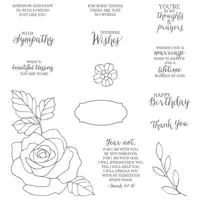
⦁ Stamp Sets –Rose Wonder (140697)
⦁ Card Stock –Whisper White Thick (140272); Smoky Slate (131202); Whisper White 100720
⦁ Stamp Pads – Smoky Slate (131179)
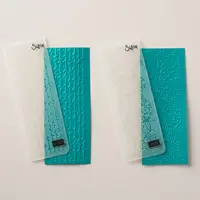
⦁ Misc.- Big Shot (143263); Stitched Shapes Framelits (145372); Garden Trellis Textured impressions Embossing Folder (143741); Rose Garden Thinlits (140619); Sweet Soiree Embellishment Kit (145578); Dimensionals (104430); Snail Adhesive ( 104332); Mini Glue Dots (103683)

Measurements:
⦁ Whisper White Thick: 5-1/2″ x 8-1/2″ scored at 4-1/4″ and folded at score line.
⦁ Smoky Slate 3-7/8″ x 5-1/8″
⦁ Whisper White: 3-3/4″ x 5″ and 3″ x 5-1/2″ for die cutting

Instructions:
⦁ Emboss the larger Whisper White piece using the Garden Trellis Textured Embossing Folder.
⦁ Adhere this to the Smoky Slate piece with Snail Adhesive and then adhere this to the Thick Whisper White Card base.
⦁ From smaller Whisper White piece cut the oval using the Stitched Shapes Framelits and stamp the sentiment and “frame” in Smoky Slate Ink and cut this out using the Rose Garden Thinlits.
⦁ Adhere the oval to the card using Stampin’ Dimensionals.
⦁ Adhere the framed sentiment using Stampin’ Dimensionals
⦁ Adhere the flowers from the Sweet Soiree Embellishment Kit using Mini Glue Dots.

I appreciate you stopping by today and would love to have you back as often as you like.  Should you ever need any Stampin’ Up! product, I’d love it if you’d purchase from me in my online store.  You can click on the “Shop Now: button on the right or if you need any of the supplies used today all you have to do is click on the products featured below and it will take you right to my store.

Price: $110.00

12 different ideas using the Perennial Birthday Card Kit

Yesterday I shared with you the photo below featuring 16 cards I made from the Perennial Birthday Card Kit.  Today I’m going to show them up close so you can get a better look at the versatility of this awesome kit.

Stampin' Up! Perennial Birthday Project Kit, Perennial Birthday stamp set, Stampin' Studio

Here are the cards they way the kit was designed.  If you follow the directions in the kit, you’ll make 4 of each of these cards to put in the beautiful file box.  Everything is included in the kit except the Perennial Birthday Stamp set, the Dapper Denim, Old Olive and Flirty Flaming stamp pads.

Stampin' Up! Perennial Birthday Project Kit, Perennial Birthday stamp set, Stampin' Studio

Using no additional products, I started playing around with the card bases and the elements that come with the kit and came up with cards 5-8 shown below.  For the white balloons I just flipped the blue balloons that come in the kit over and stamped the polka dots from the Perennial Birthday stamp set.  I also cut into the card bases themselves to make a few different fun fold cards.

Stampin' Up! Perennial Birthday Project Kit, Perennial Birthday stamp set, Stampin' Studio

A little more playing around and turning some of the card bases from horizontal to vertical and vise versa and I came up with cards 9-12.  The floral strip on the pink card is part of what I cut off the card base in the previous card.

Stampin' Up! Perennial Birthday Project Kit, Perennial Birthday stamp set, Stampin' Studio

And here are the final cards 13-16 that I came up with.  I stamped the flowers from the Perennial Birthday stamp set on the envelopes that come in the kit, so that they’d coordinate with the set as well.

Stampin' Up! Perennial Birthday Project Kit, Perennial Birthday stamp set, Stampin' Studio

Feel free to order your own kit and try your hand at recreating the cards I’ve shown or come up with your own creations.  I promise you, you’re going to love this kit!