Many Mittens Framelits

You know that saying, “Warm hands, warm heart”?  That’s what I think of when I look at this card featuring the Many Mittens Framelits Dies and the Cable Knit Embossing Folder.

Stampin' Up! Many Mittens Framelits, Hearts Come Home stamp set, Stampin' Studio

I love the depth of texture on the Whisper White cardstock created with the Cable Knit Embossing Folder.  These detailed mittens are very easy to make; 2 white mittens cut out with the mitten outline and 2 red mittens cut out with the detailed stitching.  Then all I had to do was layer the mittens on top of one another and attache the Quilted Christmas Ribbon to the backs of the mittens.  The sweet sentiment from the Hearts Come Home stamp set was colored directly on the rubber with Stampin’ Write Markers before stamping it on the banner.

Order supplies Here:


Year of Cheer Suite Snowflakes

How about a card using Stampin’ Up! product that requires no stamping?  Kinda of different, huh?  I think the Year of Cheer product suite is so fabulous it speaks for itself and really no words are needed.  I mean honestly, How can you not love all of the fantastic elements in this suite?

Stampin' Up! Year of Cheer suite, Stampin' Studio

Layers upon layers of snowflakes going on here.  From the Winter Wonder Embossing Folder to the Foil Snowflakes to the Swirly Snowflakes Thinlits Die, we’ve got snowflakes galore and it adds so much depth and dimension to this card.  Add to that the Gold and White checkered print from the Year of Cheer Specialty Designer Series Paper and the Year of Cheer Embellishment and you’ve got a real showstopper of a card which would honestly work for any occasion at all.

Measurements:
⦁ Gold Foil Sheet: 4-1/4″ x 11″ scored at 5-1/2″
⦁ Thick Whisper White: 4″ x 4″ and scrap for snowflake die cut
⦁ Year of Cheer Specialty DSP: 4″ x 1″
⦁ Gold Ribbon: 8″

Instructions:
⦁ Using the Winter Wonder Embossing Folder and the Big Shot, emboss snowflake on Thick Whisper White Card Stock and attach to Gold Foil Sheet card base.
⦁ Curl up edges of Foil Snowflake with Bone Folder and layer on top of embossed snowflake with Mini Glue Dots
⦁ Using the Big Shot and the Swirly Snowflakes Thinlits Dies, cut out a snowflake and attach to Foil Snowflake with Mini Glue Dot.
⦁ Attach Year of Cheer DSP to the bottom of the card leaving a border of Gold Foil around the edges.
⦁ Thread the Gold Ribbon through the hole of the Year of Cheer Embellishment and tie it in a bow. Attach ribbon and embellishment with Mini Glue Dot.

Supply List:

Introducing the Southern Serenade stamp set!

Do you know how exciting it is to get a call from Stampin’ Up! asking you to give a presentation featuring a brand new stamp set from the Occasions catalog at On Stage Live in Salt Lake City?  Well, let me tell you, it was pretty exciting…and I was even more excited a few weeks later when I got my first look at the stamp set I was asked to present…the Southern Serenade stamp set.

Stampin' Up!, Southern Serenade stamp set, Occasions Catalog 2018, Stampin' Studio

 The beautiful Southern Serenade stamp set comes in clear or wood mount sets feature 8 stunning images and sentiments.  It’s what I call a “Do Everything” stamp set, because there are so many things you can do with it.  The sentiments are perfect for some of most popular reasons to send cards, like birthdays and thank you’s.  The images are great for many different techniques, and I’ll be sharing the techniques and cards I presented over the next few days.  This fabulous stamp set will be one of the many offerings in the Occasions catalog which goes live on January 3rd.

Stampin' Up!, Southern Serenade stamp set, Occasions Catalog 2018, Stampin' Studio

Let’s take a closer look

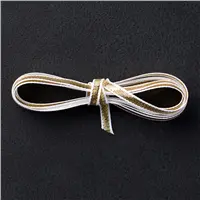
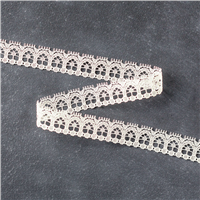
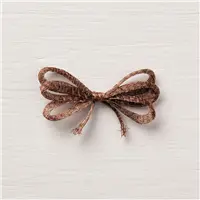
I stamped the floral image in Basic Black ink on the Wood Texture Designer Series Paper and water colored it in with my Aqua Painter and Rich Razzleberry  and Old Olive Ink.  Generally we only think of water coloring on Water Color Paper, or Shimmery White Card Stock or Whisper White and Very Vanilla, but water coloring on Designer Paper gives a great look.  Next I stamped the lacy image around the edges of the designer paper in Crumb Cake ink.  I love the look of lace and wood together.  Finally I added a row of Rich Razzleberry cardstock, Very Vanilla Lace Trim, and Copper Trim just below the stamped image and finished it off with a Linen Thread double bow.

Measurements

Rich Razzleberry: 4-1/4″ x 11″ scored at 5-1/2″

Rich Razzleberry: 4″ x 1/4″

Wood Textures DSP: 4″ x 5-1/4″

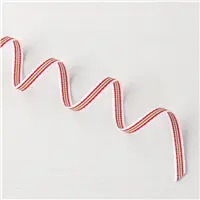
Very Vanilla Lace Trim: 5″

Copper Trim: 5″

Linen Thread:  12″

Supply List (excluding the Southern Serenade stamp set)