Peaceful Place Christmas Card

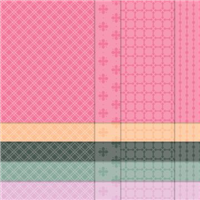
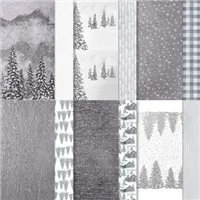
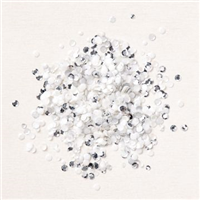
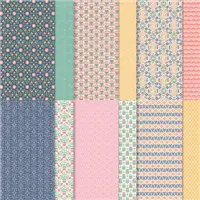
Sparkle, glitter and shine…this card is so simple yet elegant, just like newly fallen snow in the winter.  This card features the Peaceful Place Specialty Designer Series Paper along with the subtle Shimmer Sequins and the White Glittered Organdy Ribbon from the same suite of products.

Stampin' UP! Peaceful Place Specialty Designer Series Paper, Holl;y Jolly Wishes stamp set, Stampin' Studio

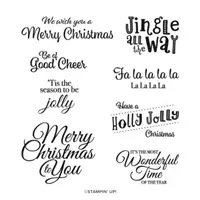
One thing that makes this card so special is the fact that you can see both sides of the designer paper in the card.  One one the front and the other when you open the card up.  I used the Scalloped Contour Dies for the inside panel and the Holly Jolly Wishes for the sentiment.

Stampin' UP! Peaceful Place Specialty Designer Series Paper, Holl;y Jolly Wishes stamp set, Stampin' Studio

Measurements:

Basic White Thick : 4-1/4″ x 5-1/2″

Basic White: 3-1/4″ x 3-1/4″ and 3-1/2″ x 5″

Peaceful Place DSP: 8″ x 5-1/4″ score at 4″

Smoky Slate: 3″ x 3″

White Glittered Organdy Ribbon: 8″

Instructions:

  • Fold Designer Paper on score line and attach to the large Thick Basic White piece with fold to the left side
  • Attach the 3-1/4″ x 3-1/4″ basic White piece to the card front, then attach the Smoky Slate piece on top with Stampin’ Dimensionals.
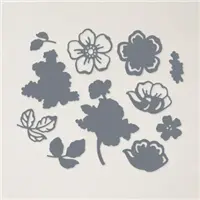
  • Attach snowflake with Multi-purpose Glue, then attach a few of the Subtle Shimmer Sequins.
  • Tie a bow with the ribbon and attach to the card front with Mini Glue Dots
  • Die-cut the second largest scalloped rectangle from the remaining Basic White piece using the Scalloped Contour Dies, then stamp the sentiment from Holly Jolly Wishes in Basic Gray and attach to the inside of the card.  
  • Attach a few of the Subtle Shimmer Sequins with Multi-purpose Glue.

Sale-a-bration is going strong – now through September 30th you can choose from a variety of products for FREE with a minimum $50 order.

You can order the supplies for today’s card by clicking the products below which will take you directly to my online store.

Supply List

Thank you for taking time to visit my blog, for shopping with me and for your loyalty to Stampin’ Studio!  I know there are a lot of demonstrators out there to choose from… THANK YOU for choosing me!  To show my appreciation, I have something special for you!  When you use the Host Code on your order, you earn rewards from me! Place an order of $30 or more using my current host Code and you’ll receive 3 card project tutorials that you will not see featured on my blog.
CURRENT HOST CODE: Use this host code to place your online order.  If your order is over $150 DO NOT use the code – you’ll get your own Stampin’ Rewards from Stampin’ Up! and you’ll still get the project tutorials from me.  Just copy/paste this code: J2PU7QB7 when placing your order.


FOLLOW ME….


Shaded Summer stamp set & Summer Shadow Dies

Oooooh, don’t you love Night of Navy paired with Basic White?  It’s just so elegant and classic.  My friend Susan Campfield created this card using the Shaded Summer stamp set and the Summer Shadow Dies.  

Stampin' Up! Shaded Summer stamp set, Summer Shadow  Dies, Sale-a-bration, Fun Fold, Stampin' StudioNot only is this a gorgeous card, but it’s also a Fun Fold called a Corner Tuck card.  The front flap tucks into the triangle corner pocket.  Isn’t that cleaver?  I love that the Summer Shadow Dies (a free Sale-a-bration item with a $100 purchase) coordinates with the Shaded Summer stamp set found in the Annual Catalog.

Stampin' Up! Shaded Summer stamp set, Summer Shadow  Dies, Sale-a-bration, Fun Fold, Stampin' Studio

Measurements:

  • Night of Navy: 4 ¼” x 8” scored at 2 ½”; 3” x 3” cut diagonally
  • Basic White: 3” x 3”; 2 ¾” x 2 ¾”; 3” x 4” (to stamp the flower on and die cut)
  • DSP: 1” x 4”; 3” x 3” cut diagonally

Instructions:

  1. Stamp the flower in Night of Navy. Die cut the flower with the Shaded Summer dies.
  2. Stamp the greeting “hello you” in Night of Navy in the lower left corner of the 3″ x 3″ Basic White piece.
  3. Stamp a portion of the other flowering branch on the bottom right corner of the 2-3/4″ x 2-3/4″ Basic White piece.
  4. Adhere one of the triangular pieces of Designer Paper to one of the triangular pieces of Night of Navy. (Save the other triangle pieces for another card).
  5. On the back of this layered triangular piece, carefully place Dimensionals in each of the
    three corners – place NO Dimensionals on the long, straight edge so that the corner of the front piece can tuck under. Adhere this in the upper right corner of the inside of the card.
  6. Adhere the 1″ x 4″ piece of Designer Series Paper on the front of the card next to the folded edge.
  7. Place adhesive ONLY on the back left side of the “hello you” piece and adhere it to the card front. The upper right corner should tuck under the triangular Designer Paper piece.
  8. Place adhesive on the back of the 2-3/4″ x 2-3/4″ piece with the flowers in the bottom corner. Open the card and lightly tuck the upper right corner of this inside piece under the Triangular piece. Before completely adhering, close the card and make sure the inside piece won’t show when the card is closed. Press it in place.
  9. Place Dimensionals on the back of the die cut flower branch. Adhere it to the “hello you” piece on the front of the card, make sure the flower placement won’t interfere with the tucking of the upper right corner (placing the flower branch at an angel is best).
  10. Place three of the clear Elegant Faceted Gems (two large and one small) on the “hello you” piece on the card front.
  11. Wrap the ribbon around the left side of the front flap of the card, tie a knot.

Sale-a-bration is going strong – now through September 30th you can choose from a variety of products for FREE with a minimum $50 order.

You can order the supplies for today’s card by clicking the products below which will take you directly to my online store.

Supply List

Thank you for taking time to visit my blog, for shopping with me and for your loyalty to Stampin’ Studio!  I know there are a lot of demonstrators out there to choose from… THANK YOU for choosing me!  To show my appreciation, I have something special for you!  When you use the Host Code on your order, you earn rewards from me! Place an order of $30 or more using my current host Code and you’ll receive 3 card project tutorials that you will not see featured on my blog.

CURRENT HOST CODE: Use this host code to place your online order.  If your order is over $150 DO NOT use the code – you’ll get your own Stampin’ Rewards from Stampin’ Up! and you’ll still get the project tutorials from me.  Just copy/paste this code: FGJ4UANN when placing your order.


Evening Evergreen for Christmas

For the month of August, my In Color Club focused on Evening Evergreen, so I created this Christmas card using the Evergreen Elegance stamp set which went in the package with all of the Evening Evergreen products.  I’m very happy with how this monochromatic card turned out featuring many of the Evening Evergreen products.  I used the card stock and Designer Series Paper, as well as the Ribbon and Jewels.

Stampin' Up! Evergreen Elegance stamp set, In Color, Stampin' Studio

I used the Scalloped Border Dies for the Basic White Label as well as the scallop trim cut from the In Color Designer Series Paper.  The Merry Christmas sentiment was fussy cut with my Paper Snips (sorry…not die to cut that out).

For the inside of the card I stamped the sentiment in Evening Evergreen, then stamped the tree three times at varying heights without reinking the stamp.  This gives the illusion of the lighter colored trees being in the background.

Sale

Sale-a-bration is going strong – now through September 30th you can choose from a variety of products for FREE with a minimum $50 order.

You can order the supplies for today’s card by clicking the products below which will take you directly to my online store.

Supply List

Thank you for taking time to visit my blog, for shopping with me and for your loyalty to Stampin’ Studio!  I know there are a lot of demonstrators out there to choose from… THANK YOU for choosing me!  To show my appreciation, I have something special for you!  When you use the Host Code on your order, you earn rewards from me! Place an order of $30 or more using my current host Code and you’ll receive 3 card project tutorials that you will not see featured on my blog.

CURRENT HOST CODE: Use this host code to place your online order.  If your order is over $150 DO NOT use the code – you’ll get your own Stampin’ Rewards from Stampin’ Up! and you’ll still get the project tutorials from me.  Just copy/paste this code: FGJ4UANN when placing your order.