5 Days & more than 5 ways to use Shimmer Paint: Day 5

This is my final share in my Shimmer Paint Series.  If you happened to miss my other posts in the series, you can view them by clicking on the following links.

Day 1

Day 2

Day 3

Day 4

I love the way this card turned out, with the vertical Fun Fold, so let’s get to it!

Stampin' Up!, Dashing Deer stamp set, Shimmer Paint, Stampin' Studio

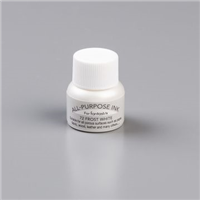
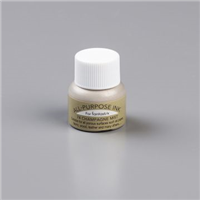
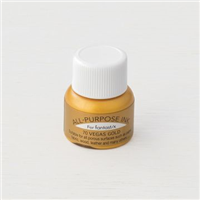
For this card I sponged the White Frost Shimmer Paint directly onto the stamp with a Sponge Dauber.  Yes I know I’ve shown this Shimmer Paint technique already, but I just had to share this card, and I want to tell you how how you can add an extra technique to Shimmer Painting on stamps (Day 1).  You can make any color Shimmer Paint you’d like, by spilling out a little of the shimmer paint onto your Silicone Sheet or a piece of waxed paper, then add a drop or two of your choice of  Re-inker, depending on how dark you want it.  Stir the ink into the Shimmer Paint, and then sponge it onto the stamp for shimmer in any color!

Now, onto the details for the Vertical Double Z-Fold card.

Stampin' Up!, Dashing Deer stamp set, Shimmer Paint, Stampin' Studio

The Night of Navy card base is 4-1/4″ x 11″ scored at 5-1/2″ and 8-1/4″ then folded on the score lines “accordion style”.  I ran the top and bottom sections of this piece through the Big Shot with the Swirls & Curls Embossing Folder.  Next a 3″ x 10″ piece of Thick Whisper White cardstock scored at 4-1/2″ and 7-1/4″”.  This also get’s folded “accordion style”.  The Whisper White fold layer is attached to the Night of Navy layer as shown using Tear & Tape.  The Night of Navy piece that the Dashing Deer image is stamped on is cut 2-3/4″ x 4-1/4 and the sentiment piece is 2-3/4″ x 2-1/2″.  I left the center section of the Whisper White cardstock blank so that a personal note could be added there.

Stampin' Up! Shimmer Paint, Stampin' Studio

The Shimmer Paint techniques I’ve shared this week are just a small taste of what this gorgeous Shimmer Paint can be used for.  A tiny bit of this paint goes a ling way and it dries pretty quick, so using it is a breeze.  I hope you’ve enjoyed this week long series.  If you have a suggestion of another product series you’d like to see, pop me a comment.

Supplies used on today’s card

5 Days & more than 5 ways to use Shimmer Paint: Day 4

We’ve covered a number of Shimmer Paint techniques over the past three days:  Shimmer Paint Doilies, Shimmer Painting on the stamps, Waxed Paper Shimmer Background, Shimmer Faceted Dot Embellishments, Shimmer Glimmer Paper, and today I’ve got another for you on an easy Fun Fold card. This one is Shimmer Paint Spritz!

Stampin' Up! Peaceful Noel stamp set, Frosted Floral DSP, Shimmer Paint, Stampin' Studio

I tried and tried to get a picture of the entire card where you could see all the shimmer and shine, but it won’t photograph well:(  So let me tell you about it first and then I’ll show you a close up where you can see just how pretty it is. 

I was inspired by the Frosted Floral Specialty Designer Series Paper.  You can’t tell from the photos in the catalog, but these papers all have a gorgeous shimmery shine to them, so I wanted the entire card to shimmer.  I started out with a Stampin’ Spritzer and added about 4 drops of the Champagne Mist Shimmer Paint and filled it up about 1/2″ from the top with rubbing alcohol and shook it up really well.  I spritzed this on a 4″ x 5-1/4″ piece of Gray Granite cardstock.  Once this dried (which is pretty fast, as the alcohol speeds up the process) I attached it to a 4-1/4″ x 5-1/2″ piece of Blackberry Bliss cardstock.  This became the base of the card.  Next I used a 2-3/4″ x 11″ piece of Blackberry Bliss cardstock and folded it in half, then added a 2-1/2″ x 5-1/4″ piece of the Frosted Floral Specialty DSP to the front.  I attached this folded piece to the card base with Snail Adhesive.  This folded piece is the panel that opens up for the inside sentiment.  The sentiment comes from the Peaceful Noel stamp set and was stamped in Blackberry Bliss on Whisper White cardstock then cut out with the Layering Ovals Framelits and spritzed with the Shimmer Paint & alcohol.  This was layered on the scallop oval.  I cut out the leaves using the In the Woods Framelits and Whisper White cardstock, then spritzed some more.  The leaves were attached to the front panel and the ovals were popped up with Stampin’ Dimensionals.

Stampin' Up! Peaceful Noel stamp set, Frosted Floral DSP, Shimmer Paint, Stampin' Studio

Here you can see some of the shimmery sparkle on the Gray Granite piece as well as on the leaves.  You have got to try this, so you can see how stunning the Shimmer Paint Spritz is! 

I hope you’ve been enjoying seeing different ways to use your Shimmer Paints.  Tomorrow I’ll be sharing one more card using the Shimmer Paints.

Order your supplies to make this card

5 Days & more than 5 ways to use Shimmer Paint: Day 3

I held a class last night featuring the All is Bright Suite and I thought since I’ve been sharing how to use Shimmer Paint on my blog this week, why not use Shimmer Paint on one of the cards for class.  This is one of the cards from class.

Stampin' Up! All is Bright Suite, Shimmer Paint, Stampin' Studio

I love the All is Bright Designer Series paper which is part of the All is Bright Suite of products and this print with the metallic ornaments is my favorite print in the package.  I wanted to make an ornament on the card to match the ornaments in the paper.  I think I succeeded in that task, what do you think?  You know how I like layers and texture, so this card has lots of it but I don’t think it’s too over powering.  Because I love you, here are the full details on how I created this card including the Shimmer Paint Technique.

Supplies:

  • Stamp SetsMerry Christmas to All (147702)
  • Card Stock –Whisper White Thick (140272); Crumb Cake (120953); Whisper White (100730); All is Bright Designer Series Paper (147892); Champagne Foil Sheets (144748); Sparkle Glimmer Paper (146957)
  • Stamp Pads – Crumb Cake (147116)
  • Misc. – Big Shot (143263); Merry Christmas Thinlits Dies (147912); Swirls & Curls Embossing Folder (147923); Layering Circles Framelits (141705); Christmas Bulb Builder Punch (148013); Vegas Gold Shimmer Paint 146886); Sponge Dauber (133733); Whisper White Bakers Twine (124262); Mini Glue Dots (103683); Snail Adhesive (104332); Stampin’ Dimensionals (104430)

Measurements

  • Whisper White Thick cardstock: 4-1/4″ x 11″ score at 5-1/2″             
  • Crumb Cake cardstock: 4″ x 5-1/4″
  • All is Bright Designer Series Paper: 2” x 5”
  • Whisper White cardstock: 4-1/4” x 2”
  • Champagne Foil Sheet: 4” x 1” and small scrap for top of ornament
  • Sparkle Glimmer Paper: 3” x 3”
  • Whisper White Bakers Twine: 4” 

Instructions: 

  • Attach All is Bright DSP to right side of Crumb Cake cardstock with Snail Adhesive
  • Run 1” x 5” piece of Champagne Foil Sheet through the Big Shot with the Swirls & Curls Embossing Folder. Attach this to the Crumb Cake cardstock about ½” from the lower edge.
  • Cut circle from Sparkle Glimmer Paper using the 2nd largest circle from the Layering Circles Framelits.
  • Shake up Vegas Gold Shimmer Paint and use Sponge Dauber to pick up the paint from the inside of the paint lid. Tap and rub the shimmer paint on the Sparkle Shimmer Paper.
  • Use the Christmas Bulb Builder Punch and a small scrap of Champagne Foil to punch out the top of the ornament.
  • Attach ornament top to Sparkle Shimmer Paper Circle with a mini Glue Dot.
  • Attach Whisper White Bakers Twine to the back of the ornament with a Mini Glue Dot.
  • Attach ornament to the Crumb Cake cardstock with Stampin Dimensionals.
  • Secure the other end of the baker’s twine to the back side of the Crumb Cake cardstock with a Mini Glue Dot.
  • Die-cut “Holidays” from the Whisper White cardstock with the Big Shot and the Merry Christmas Thinlits
  • Attach “holidays” to the ornament with Mini Glue Dots
  • Stamp “happy” in Crumb Cake ink on the crumb Cake cardstock in the upper left area.
  • Attach Crumb Cake cardstock to the folded Thick Whisper White card base with Snail.

Order supplies for this card  

Price: $110.00