5 Days & more than 5 ways to use Shimmer Paint: Day 2

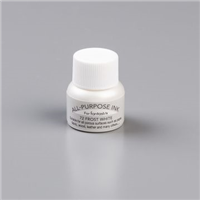
It’s Day 2 of my Shimmer Paint Series.  If you missed it, yesterday I showcased 3 different ways to use the Shimmer paints.  You can view Day 1 HERE.  Before I get into the details of today’s card, I wanted to explain how to clean your stamps and Sponge Daubers.  Because the Shimmer Paints dry relatively quick, you want to clean them well with soap and water before the paint dries.  I run the dauber under the water faucet, then add one pump of liquid soap to the tip of the dauber.  Next I run the stamp under the facet and then use the soaped up Sponge Dauber to rub the paint off, then I pat it dry with a paper towel.  This method cleans the stamp off really well and it gets most of the paint off the dauber.  I use a little more soap and my finger nail across the dauber to remove any remaining paint then allow it to air dry.

Stampin' Up! Christmas Bulb Builder Punch, Sprig Punch, Shimmer Paint, Stampin' Studio

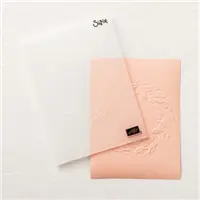
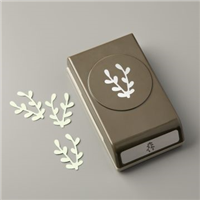
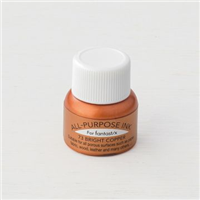
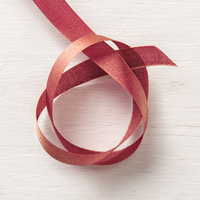
 I started the card out with a piece of Whisper White cardstock that I ran through the Big Shot with the  Seasonal Wreath Embossing Folder.  A Sponge Dauber inked up with the Frost White Shimmer Paint and gently rubbed over the embossed wreath really makes it pop.  I had seen a few reindeer made with the Christmas Bulb Builder Punch and the Sprig Punch and thought I’d give it a try.  The heads (Christmas Bulb Builder Punch) are punched from Soft Suede cardstock while the antlers (Sprig Punch) are punched from Crumb Cake cardstock. The noses and the snowflake and bow are all part of the Santa’s Workshop Enamel Shapes.  You can’t see it in the photo but the red and white diagonal stripes are actually fuzzy and flocked and add great texture.  A simple knot tied in the Poppy Parade Textured Weave Ribbon adds a bit more depth to the card.  I stamped the sentiment from the Dashing Deer stamp set and curled the ends of the banner a bit for some more visual interest.

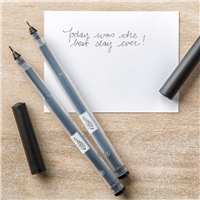
Hint:  The eyes were punched from the Cookie Builder Punch.  These eyes are tiny , but they were easy to get them where I wanted them by using the Take Your Pick Tool and the Multi Purpose Glue.  I drew the eyebrows and eye lashes on with the Journaling Pen and added highlights in the eyes with the White Watercolor Pencil.

Stampin' Up! Take Your Pick Tool, Stampin' Studio

So far, we’ve covered waxed paper Shimmer Paint, Shimmer Paint accent pieces, Shimmer Paint stamping, and Shimmer Paint on Embossing…what will I have to share with you tomorrow?  Be sure to come back to see!

Supplies Used on Today’s Card

Price: $110.00


5 Days & more than 5 ways to use Shimmer Paint: Day 1

I’ve been getting lots of requests to show different ways to use Shimmer Paint, so I thought I’d do a series on it.  All week long I’ll be sharing different techniques and ways that Shimmer Paint can be used to add some shimmer to your projects.  Our Shimmer Paint comes in 4 different shades, we have Bright Copper, Champagne Mist, Frost White and Vegas Gold and each one is stunning in it’s own way.  I shared a card the other day using the Copper Shimmer Paint on Doilies.  You can see that HERE

Stampin' Up! Shimmer Paint, Stampin' Studio

Today’s card features 3 different ways to use Shimmer Paint.  I started out using the Bright Copper Shimmer Paint with a sponge Dauber and I pounced the paint directly on the stamp from the Merry Christmas to All stamp set.  The paint dries relatively fast, so you want to make sure to clean your stamp and Sponge Dauber right way.

Stampin' Up!, Merry Christmas to All stamp set, Copper Shimmer Paint, Stampin' StudioNext, I created an interesting background on the Merry Merlot cardstock by spilling a small amount of Shimmer Paint on waxed paper.  I then used a second piece of waxed paper that I crumpled up into a ball to pick up a bit of the paint and pounced it on the cardstock in a random pattern.

My third use of the Shimmer Paint was to change the color of the Faceted Dots.  Since we have no dot embellishments that come in copper, I thought this was the perfect solution.  The Faceted Dots come in a package with Basic Black, Blackberry Bliss, Grapefruit Grove and Mint Macaron, but with a Sponge Dauber and the Bright Copper Shimmer Paint, I was able to pounce the copper color onto the dots and now I have the perfect embellishment to coordinate with the Merry Merlot & Copper Reversible Ribbon and the Snowflake Wire Embellishments.

Be sure to come back each day this week, for more ways to use the wonderful Shimmer Paints

Supplies used on today’s card


Joyous Noel Suite

Have you noticed the Joyous Noel suite of products in the Holiday Catalog?  There are lots of touches of copper that will help you make incredibly beautiful projects.  This is a card I made for a swap with other demonstrators right after we got back from the Alaska Cruise.

Stampin' Up! Joyous Noel Suite, Stampin' Studio

You can see the shimmer copper shine on the Joyous Noel Specialty Designer Series Paper on the left side of the card.  The print pairs great with the Layered Leaves Embossing Folder that I used with Tranquil Tide card stock on the right side of the card.  I did some heat embossing with Copper Embossing Powder for the sentiment and added the pine boughs and berries, all from the Peaceful Noel stamp set.  Three Layers of circles die-cut with the Layering Circles Framelits really highlights the focal point.  How about a little more copper shimmer?  Check out the Merry Merlot & Copper Reversible Ribbon.  Once side is Merry Merlot with Copper edges and the other, shown here, has copper throughout the Merry Merlot ribbon.  All of the Copper touches are pretty here, but in person, they are stunning!

Supplies Used 

Price: $110.00