3 ways to create texture on a card

Texture, whether it’s visual or tactile texture, is a great way to add make an average card become a wow card.  For today’s card I used the Gathered Leaves dies, the Come to Gather Designer Series Paper and the Come to Gather Ribbon to show you 3 ways to create texture on a card.

Stampin' Up! Gather Together stamp set, Gathered Leaves Dies, Come to Gather DSP, Stampin' Studio

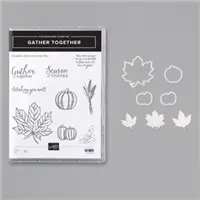
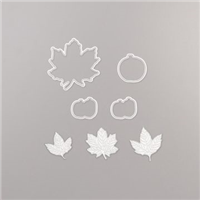
So, let’s start with the obvious texture here; that would be the textured leaves that were cut from Pumpkin Pie, Cajun Craze and Cherry Cobbler cardstock using the Gathered Leaves Dies.  In this set of 7 dies, 3 of the leaves (in slightly different sizes) not only die-cut but they also emboss at the same time.  Notice the veins in the leaves?  That gorgeous texture is what happens when you run it through a die cutting machine with cardstock.  To make the texture a bit more visible, I sponged a little Sahara Sand ink over the veining.

Gathered Leaves Dies Stampin' Studio

Gathered Leaves Dies #150662 $26.00

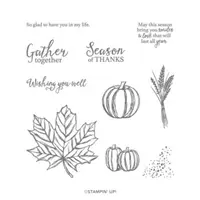
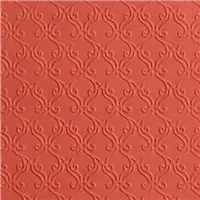
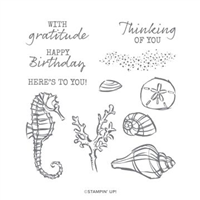
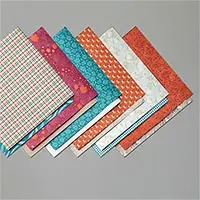
The second texture you can see is the visual texture of the wood-grain print found in the Come to Gather Designer Series Paper Package.  Event though the paper is smooth to the touch, your eyes recognize the texture and depth of the wood grain.  This particular print is great to stamp directly on, which I did with the sentiment from the Seaside Notions stamp set.  I think this card is a great masculine card or for any nature lovers out there.

Come to Gather DSP, Woodgrain print, Stampin' Studio

Come to Gather DSP #150454

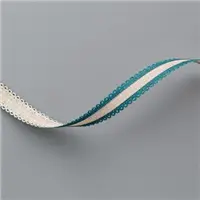
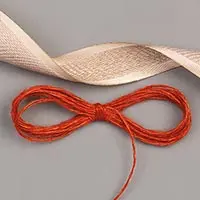
The third use of texture on this card comes from the Come to Gather Ribbon Combo Pack.  The package comes with a Cajun Craze Linen Thread as well as the Crumb Cake ribbon with a woven center and satin edges.  I chose to use just the Crumb Cake ribbon because I felt the woven center of the ribbon really complimented the texture in the leaves and the grain of the wood.  

Come to gather Ribbon, Stampin' Studio

Come to Gather Ribbon Combo Pack #150456 $9.00

If you’d like to try using 3 ways to create texture on a card you can order the supplies below.&

;

The perfect Autumn into Winter card

Here in Wisconsin, we are certainly starting to see Autumn starting to slow down and thoughts of Winter creeping closer.  With that in mind I have a card that I think fits this time of year really well.  I used the Gather Together Bundle to create this Autumn into Winter card.

Stampin' Up! Gather Together stamp set, Gathered Leaves Dies, Come to Gather DSP, Stampin' Studio

There are so many fabulous things going on with this card, yet I think everything is very balanced and not over done.  We’ve got fabulous texture from the delicate embossing on the card base and the die-cut/embossed leaves.  Beautiful prints found in the designer paper and layered up with coordinating cardstock.  And of course we can’t forget the ribbon embellishment, because what’s a card without layers, texture and embellishments, right!?  Are you ready to create your own perfect Autumn into Winter card?

Measurements

  • Very Vanilla: 4-1/4″ x 11″ and 2-1/2” x 5/8”                   
  • Early Espresso: 2-1/4” x 4-1/4”
  • Pretty Peacock: 3” x 4” and 2” x 2”
  • Mint Macaron: 2” x 2”
  • Come to Gather Designer Series Paper- Polka Dot print: 2-1/4” x 4” and 3” x 3”
  • Come to Gather Designer Series Paper- Leaves print: 2” x 4”
  • Pretty Peacock Scalloped Linen Ribbon: 5-1/2” 

Instructions:

  • Fold large Vanilla cardstock in half for card base, then emboss front of card with Stylish Scrolls Embossing Folder.
  • Attach long Come to Gather Designer Series Paper- Polka Dot print to the large Pretty Peacock cardstock with Snail Adhesive and wrap Pretty Peacock Scalloped Linen Ribbon around these layers and secure on back side with Snail, then attach to card as shown.
  • Attach Come to Gather Designer Series Paper- Leaves print to Early Espresso cardstock, then attach to card as shown.
  • Stamp leaf with early Espresso ink on Come to Gather Designer Series Paper- Polka Dot print and cut out with Come Together Leaves Dies, then crumple the leaf up and uncrumple and flatted before attaching to card with Snail.
  • Cut out smaller leaves from Pretty Peacock and Mint Macaron with the Come to Gather Leaves Dies and attach to card with Stampin’ Dimensionals.
  • Stamp sentiment in Early Espresso on small Very Vanilla piece and cut a notch in the one end to create a banner. Attach banner to card as shown with Stampin’ Dimensionals.

Supply list for the Autumn into Winter card 

Halloween Treat Packaging

Today, is my final sharing of the Halloween Treat Packaging swaps from our Stampin’ Sisters Holiday Hoopla. The creators of today’s swaps made their own containers for the Halloween Treats.  Check them out!

Stampin' Up! To Every Season stamp set, Cat Punch, Stampin' Sisters Holiday Hoopla Halloween Treat packaging, Stampin' Studio

Patti Skibba created this box that hangs on a door knob.  Isn’t that clever?  I may have to CASE it and create a video tutorial on a Door Knob treat holder for Christmas.  Patti used the Monster bash DSP and the Cat Punch to adorn the box.

Stampin' Up! Spooktacular Bash stamp set, Ornate Frames Dies, Stampin' Sisters Holiday Hoopla Halloween Treat packaging, Stampin' Studio

This fun little box, created by Lori Marcantonio is so sweet.  The test tube inside the box is perfect for holding Sixlits Candy.  Don’t you love how the candy is the exact same shade of orange as the Pumpkin Pie cardstock?As with so many of the Halloween Treat packages, the Spooktacular Bash Bundle was used for the sentiment and the detailed tag.Stampin' Up! Tags, Tags, Tags stamp set, Trio of Tags Dies, Ornate Frames Dies, Stampin' Sisters Holiday Hoopla Halloween Treat packaging, Stampin' Studio

The final project from the swap is this square box with a twist.  I’m sorry, but the creators name has come off the packaging, so I can’t give credit to the creator.  The box measures 5-1/2″ tall and the base is 1″ x 1″.  It’s hard to tell in the photo, but there is some black heat embossing on the box which adds such great texture and sheen.  Once the treat is tucked inside the package, the top of the box was twisted and punched with a hole and tied with Bakers twine.  It’s a very simple box but it really packs a punch!

If you missed my other posts in this series you can view them by clicking on the following links:

Halloween Treats with Boo to You stamp set

Halloween Treats with Birds of a Feather stamp set

Halloween Treats with Clear Tiny Treat Boxes

Halloween Treats with Coffin Treat Boxes

Halloween Treats with Boxes & Bags

Shopping List for today’s projects