Color & Contour in Polished Pink

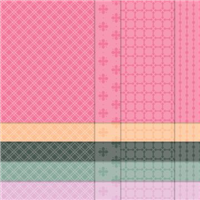
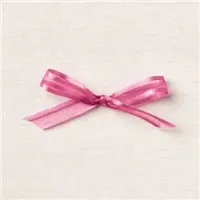
My In Color Club members all received this bundle of products featuring Polished Pink as the color of the month.  There are so many great things about Stampin’ Up! products and one that I appreciate so much is the color coordination.  Look at all the products that come in Polished Pink: Cardstock, Designer Series Paper, Ink, Stampin’ Write Marker, Stampin’ Blends Markers, Ink Refill, and Ribbon. 

Stampin' Up! Color & Contour Bundle, Polished Pink In Color Club, Stampin' Studio
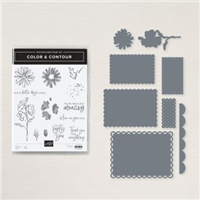
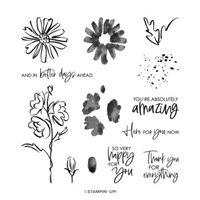
Color coordination sure makes creating beautiful projects easy!  Let’s take a close look at the card of the month featuring the Color & Contour Bundle

Stampin' Up! Color & Contour Bundle, Stampin' Studio

Measurements

  • Polished Pink: 4-1/4” x 11” scored at 5-1/2”
  • Basic White: 4” x 5-1/4” (cut 2)
  • Polished Pink Designer Series Paper: 3” x 3”
  • Polished Pink Open Weave Ribbon: 5”

Instructions:

  • Cut the scallop edge on the front of the Polished Pink piece by laying the scalloped die along the left side of the card front and run it through the Stampin’ Cut Machine and trim the top edge off before folding the card on the score line.
  • Attach one of the Basic White pieces to the inside of the card with Stampin’ Seal
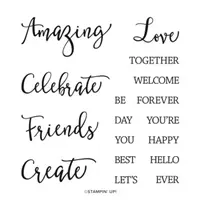
  • On the remaining Basic White piece, stamp the flower image with Memento Ink along the side and color flowers with Polished Pink Stampin’ Blends and leaves and stem with Soft Succulent Stampin’ Blends.
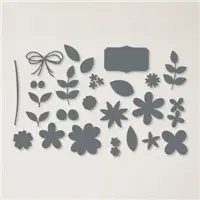
  • Cut out flowers with flower die from Scalloped Contours Die. Also cut the smallest rectangle die from Scalloped Contours and a scalloped Circle from the 2nd largest scalloped circles from the Layering Circles Dies.
  • Cut a circle from the Polished Pink Designer Series Paper using the third largest circle from the Layering Circles Dies
  • Attached Polished Pink circle to Basic White scalloped circle with Stampin’ Seal, then attach it to the card front with Stampin’ Dimensionals.
  • Attach Dimensionals to the back of the flowers and attach them to the circle layers
  • Stamp the sentiment on the Basic White scallop rectangle with Memento Ink and attach to card front with Dimensionals
  • Tie a knot in the ribbon and trim ends before attaching the ribbon to the flower stem with a Mini Glue Dot
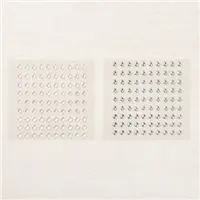
  • Finish the card with three of the Polished Pink Jewels

You can order the supplies for this card by clicking the products below which will take you directly to my online store.

Supply List

Thank you for taking time to visit my blog, for shopping with me and for your loyalty to Stampin’ Studio!  I know there are a lot of demonstrators out there to choose from… THANK YOU for choosing me!  To show my appreciation, I have something special for you!  When you use the Host Code on your order, you earn rewards from me! Place an order of $30 or more using my current host Code and you’ll receive 4 card project tutorials that you will not see featured on my blog.

CURRENT HOST CODE: Use this host code to place your online order.  If your order is over $150 DO NOT use the code – you’ll get your own Stampin’ Rewards from Stampin’ Up! and you’ll still get the project tutorials from me.  Just copy/paste this code: YRDZQYMSwhen placing your order.


FOLLOW ME….

Facebook: https://www.facebook.com/tinasstampinstudio/ 

Pinterest: https://www.pinterest.com/tinarappe/stampin-studio-creations/

Sign up for my Newsletter: https://stampinstudio.com/subscribe

Create with Friends & Pierced Blooms

I have preciously mentioned my Stampin’ Sisters Team and what an amazing group of women they are.  We have members from all across the country and we enjoy encouraging and celebrating one another online and in person.  Each month I mail out celebratory cards to those that have achieved certain milestone in our Stampin’ Sisters Family, like anniversaries, sales, promotions and team growth.  May achievements were recognized in June with the card below which features the stamp set called Create with Friends and the Pierced Blooms Dies. 

Stampin' Up! Create With Friends stamp set, Pierced Blooms Dies, Stampin' Studio

I am so in love with the Pierced Blooms Dies because they add so much texture and whimsy to the flowers and can we just talk about the Create with Friends stamp set?  With this stamp set you can combine sentiments in both cursive and block lettering to create the perfect saying for your card!

Measurements

  • Thick Basic White: 5-1/2” x 8-1/2” score at 4-1/4”
  • Coastal Cabana: 5-1/8” x 3-7/8” 3-5/8” x 1-7/8     2” x 3”
  • Bermuda Bay: 2” x 3”
  • Pear Pizzazz: 2-1/2” x2-1/2”
  • Soft Sea Foam: 2-1/2” x 2-1/2”
  • Basic White: 1-1/2” x 1-3/4”
  • Party Pack Designer Series Paper: 5” x 3-3/4”

Instructions:

  • Fold Thick Basic White cardstock on the score line and attach the large Coastal Cabana piece to the front of the card followed by the Party Pattern Designer Series Paper.
  • Stamp sentiments with Memento Ink on Basic White piece then attach this to the medium sized Coastal Cabana piece with Stampin’ Seal and then attach these layers to the card front with Stampin’ Dimensionals.
  • Using the Pierced Blooms Dies cut 2 “leaf bunches” from the Soft Sea Foam and the Pear Pizzazz pieces. Cut one large and 2 small flowers from the Coastal Cabana and the Bermuda Bay pieces
  • Use a Bone Folder to curl the edges of all the flowers, then attach the large flowers to the card front with Stampin’ Dimensionals
  • Attach 2 small Coastal Cabana die-cut flowers on the large Bermuda Bay flower with Mini Glue Dots, then attach the 2 small Bermuda Bay flowers on the large Coastal Cabana flower.
  • Tuck one Pear Pizzazz and 1 Soft Sea Foam “leave bunch” under each large flower and attach with Mini Glue Dots
  • Attach a Silver Epoxy Essential to the center of each flower

You can order the supplies for this card by clicking the products below which will take you directly to my online store.

Supply List

Thank you for taking time to visit my blog, for shopping with me and for your loyalty to Stampin’ Studio!  I know there are a lot of demonstrators out there to choose from… THANK YOU for choosing me!  To show my appreciation, I have something special for you!  When you use the Host Code on your order, you earn rewards from me! Place an order of $30 or more using my current host Code and you’ll receive 4 card project tutorials that you will not see featured on my blog.

CURRENT HOST CODE: Use this host code to place your online order.  If your order is over $150 DO NOT use the code – you’ll get your own Stampin’ Rewards from Stampin’ Up! and you’ll still get the project tutorials from me.  Just copy/paste this code: YRDZQYMSwhen placing your order.


FOLLOW ME….

Facebook: https://www.facebook.com/tinasstampinstudio/ 

Pinterest: https://www.pinterest.com/tinarappe/stampin-studio-creations/

Sign up for my Newsletter: https://stampinstudio.com/subscribe

Sweet as a Peach Box Class

I’m very excited to share a fun new class that I’ve designed.  It’s the Sweet as a Peach Box Class.        Check it out!

Stampin' Up! Sweet as a Peach stamp set, Gift Box set, Stampin' Studio

This is NOT your ordinary paper-crafting class!   Get ready to make a spectacular gift box filled with so many fun goodies.  We’ll be making a gorgeous gift box that measures 7” x 7” x 2-1/4” and we’ll fill the box will all kinds of coordinating items that will make the finished project a perfect gift to give or keep for yourself (because you know you deserve it!)  What’s in the finished gift box you ask???? There are 8 greeting cards that cover birthdays, thank you, friendship and more (envelopes are included).  We’ll be decorating a jar to fill with your favorite treats. 6 gift tags and a coordinating pen will finish off the gift box. 

Stampin' Up! Sweet as a Peach stamp set, Gift Box set, Stampin' Studio

But wait, there’s more…. Each kit will also include the “Sweet as a Peach” stamp set that is yours to keep.  The projects all use “You’re a Peach” Designer Paper.  You’ll get to keep what’s left of a ½ package of the paper.  You’ll also get 3 yards of “Pale Papaya Open Weave Ribbon” and you won’t need all of it for the projects, so there will be extra for you to keep.

Stampin' Up! Sweet as a Peach stamp set, Gift Box set, Stampin' Studio

I designed this exclusive class for a virtual cruise event I am teaching at.  I’ve hosted my own live (not virtual) Cruise Retreats in the past where we cruise in the Caribbean for a week and teach 8 classes including cards, scrapbook pages, techniques, fun folds and home décor.  These cruise Retreats are a blast, but since cruising had been put on hold, the travel agency I use for my cruise retreats started offering Virtual Cruise Retreats.  I participated as a host and taught a card class for a virtual cruise last fall and I received such positive feedback on so I thought it would be fun to participate in another.  I hope you’ll consider participating in my Sweet as a Peach Box Class (available only through Cruise & Crop).  You can find all of the information and can register for this class and others by clicking HERE 

If you’d like more information about my Live Cruise Retreat, I’ve got one planned for 2022 and one for 2023 and you can find the information on that by clicking HERE.

Thank you for taking time to visit my blog, for shopping with me and for your loyalty to Stampin’ Studio!  I know there are a lot of demonstrators out there to choose from… THANK YOU for choosing me!  To show my appreciation, I have something special for you!  When you use the Host Code on your order, you earn rewards from me! Place an order of $30 or more using my current host Code and you’ll receive 4 card project tutorials that you will not see featured on my blog.

CURRENT HOST CODE: Use this host code to place your online order.  If your order is over $150 DO NOT use the code – you’ll get your own Stampin’ Rewards from Stampin’ Up! and you’ll still get the project tutorials from me.  Just copy/paste this code: YRDZQYMSwhen placing your order.


FOLLOW ME….

Facebook: https://www.facebook.com/tinasstampinstudio/ 

Pinterest: https://www.pinterest.com/tinarappe/stampin-studio-creations/

Sign up for my Newsletter: https://stampinstudio.com/subscribe