Oh my gosh, it’s so warm here in Wisconsin this week, so it’s the perfect time to share a fun card that truly evokes Springtime! You are going to LOVE this Peek-a-boo Slider card featuring the Flowering Rainboots Bundle.

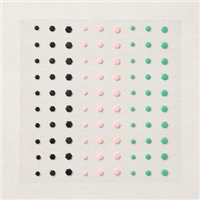
Color Combo
First of all, on the front of the card, notice the Peek-a-boo factor here….the bunch of tulips peek through the circle opening and then….wait for it….

When the card is opened up, the sentiment slides right in, over the tulips!
Here is the

I shared how to make this card on my Facebook Live Wednesday night, and you’re in luck, because I’ve downloaded the video for you to watch. If you’re unable to see the video below, please click here.
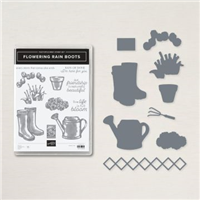
My gift to you: Place an order of $35 or more between March 16-20th and I will send you a card kit to make this card. You will need to Flowering Rainboots Bundle and ink to create the project, but I will do the embossing & punching for you.
Supplies used for todays card listed below. Just click on the photos to order.


Thank you for taking time to visit my blog, for shopping with me and for your loyalty to Stampin’ Studio! I know there are a lot of demonstrators out there to choose from… THANK YOU for choosing me! To show my appreciation, I have something special for you! When you use the Host Code on your order, you earn rewards from me! Place an order of $30 or more using my current host Code and you’ll receive 3 card project tutorials that you will not see featured on my blog.

CURRENT HOST CODE: Use this host code to place your online order. If your order is over $150 DO NOT use the code – you’ll get your own Stampin’ Rewards from Stampin’ Up! and you’ll still get the project tutorials from me. Just copy/paste this code: N94ZDCRT when placing your order.
FOLLOW ME….
Facebook: https://www.facebook.com/tinasstampinstudio/
Pinterest: https://www.pinterest.com/tinarappe/stampin-studio-creations/
Sign up for my Newsletter: https://stampinstudio.com/subscribe